Build Vendor Management Application
Create and use Objects and connect them with your Templates.
 20 min | 9 Tasks
Task 7 Create and Assign Workflow
- Go to the “Workflow” section of your Workspace Settings
- Create a new Workflow called “Vendor Lifecycle Management”
- Choose that the workflow is for Objects, and confirm.
- Create the following Stages in the Workflow Editor: To Be Onboarded, Onboarding in Process, Onboarding On Hold, To Be Approved, Approved, To Be Terminated, Terminated.
- Create an Approval between Stages “To Be Approved” and “Approved” and Publish the Workflow.
- Go back to the Objects Section, Click Edit for the “Vendors” Object, activate Workflow for the Object
- Assign the newly created “Vendor Lifecycle Management Workflow” to the Object and Confirm.
Step-by-Step Guide
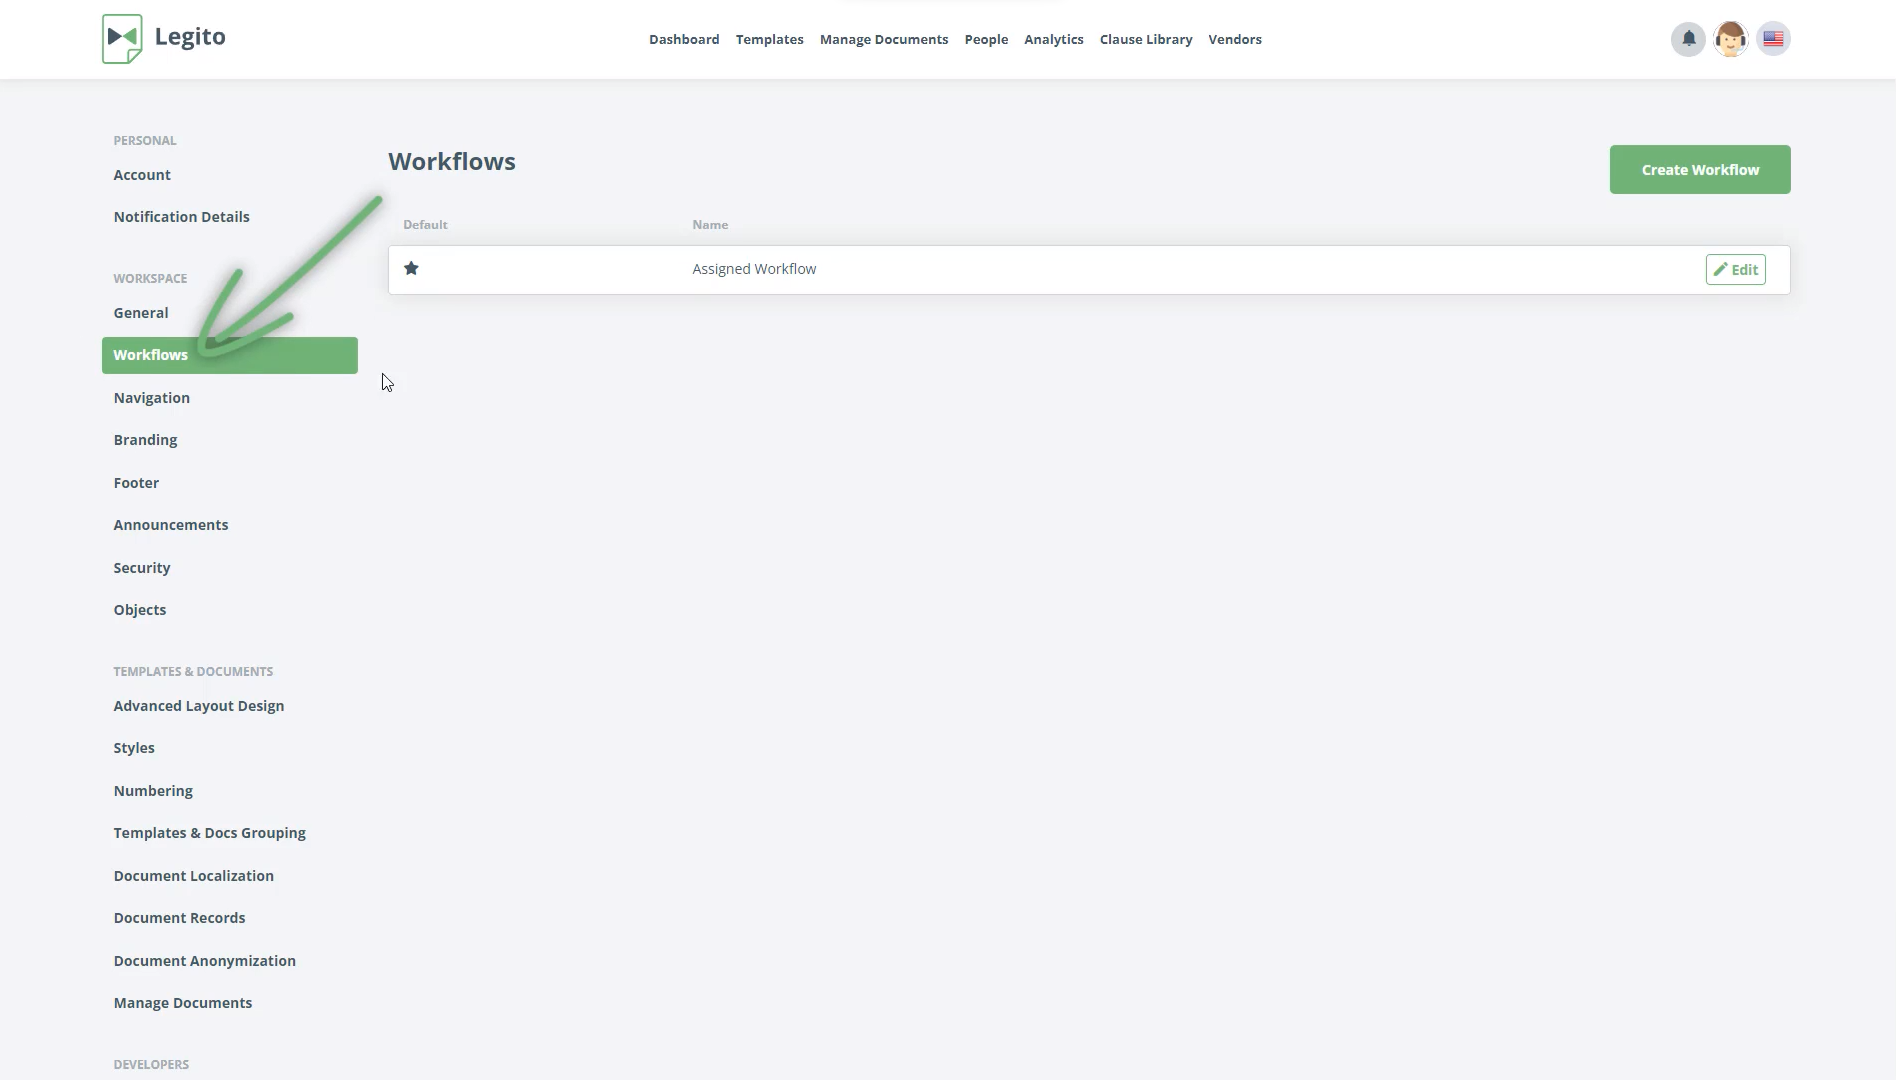
Step 1: Go to "Workflow"
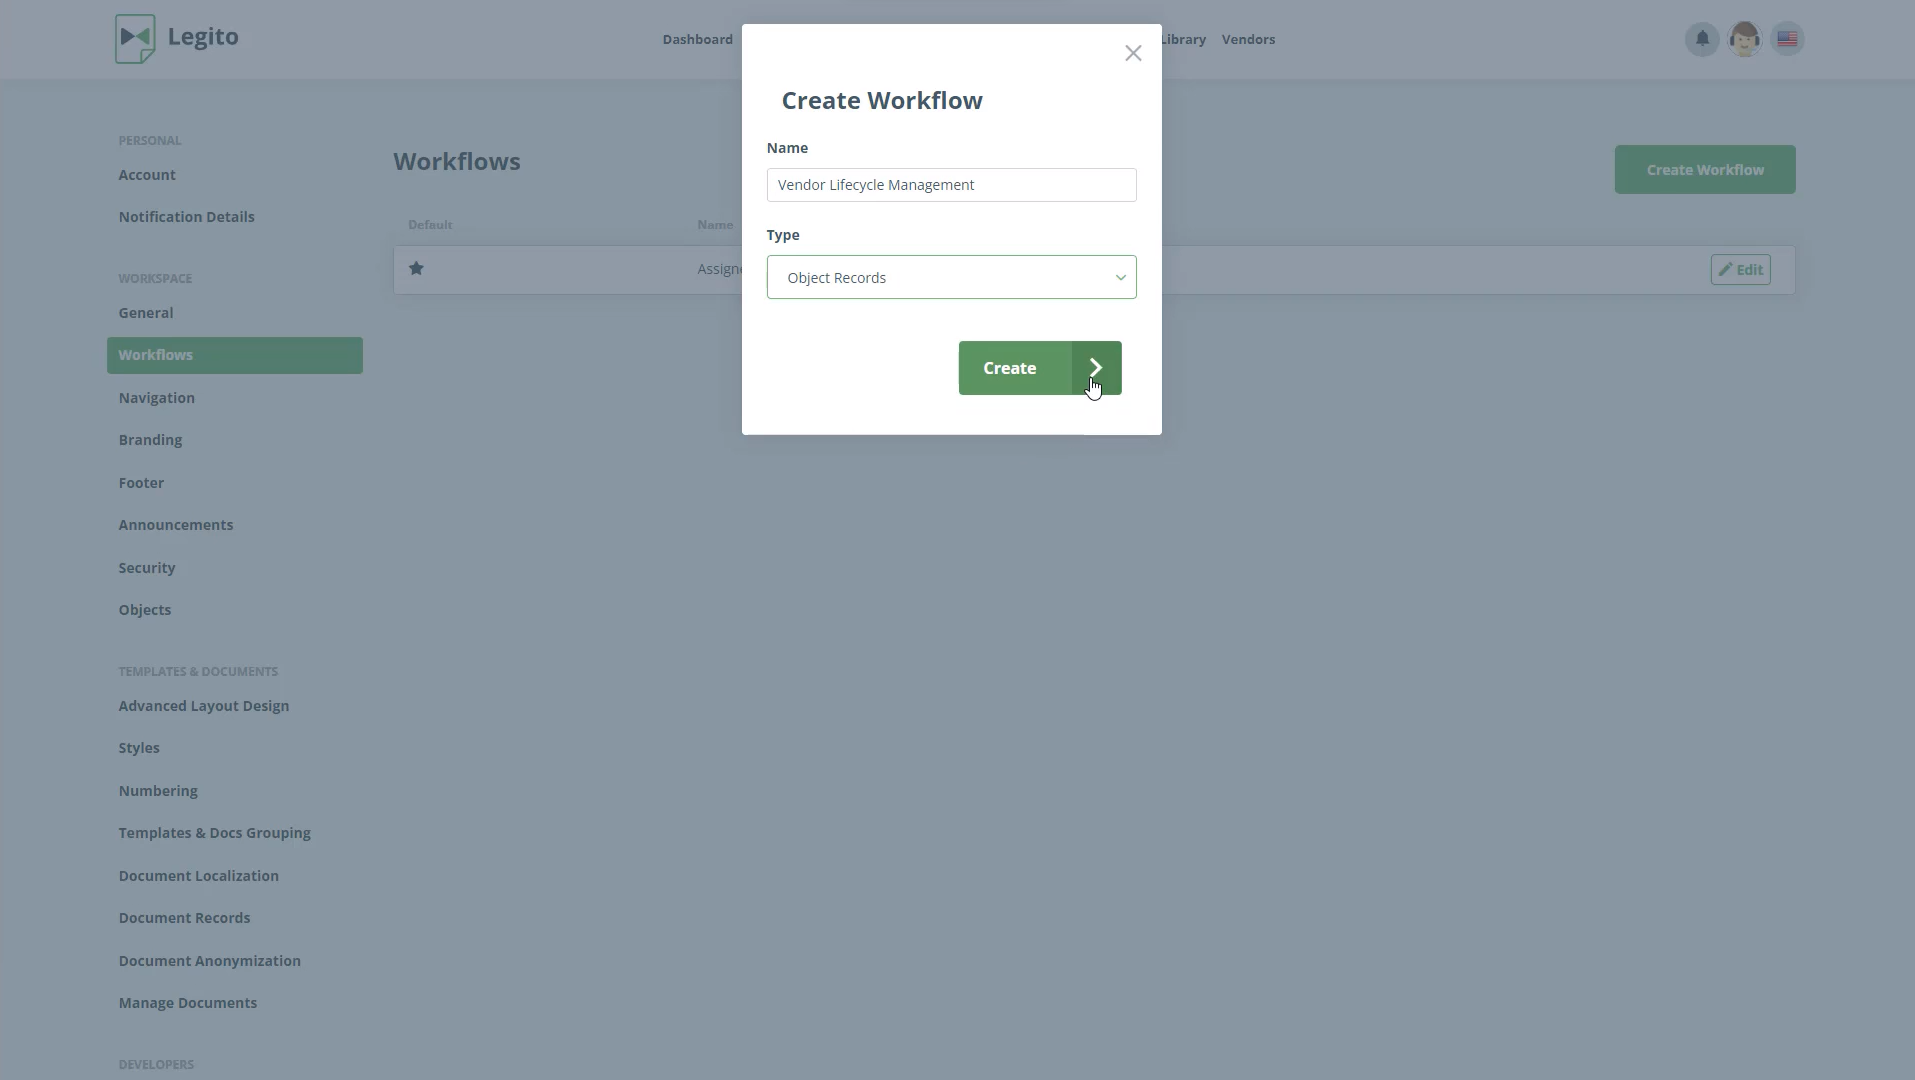
Go to the “Workflow” section of your Workspace Settings. Create a new Workflow called “Vendor Lifecycle Management.”
Choose that the workflow is for Objects, and confirm.
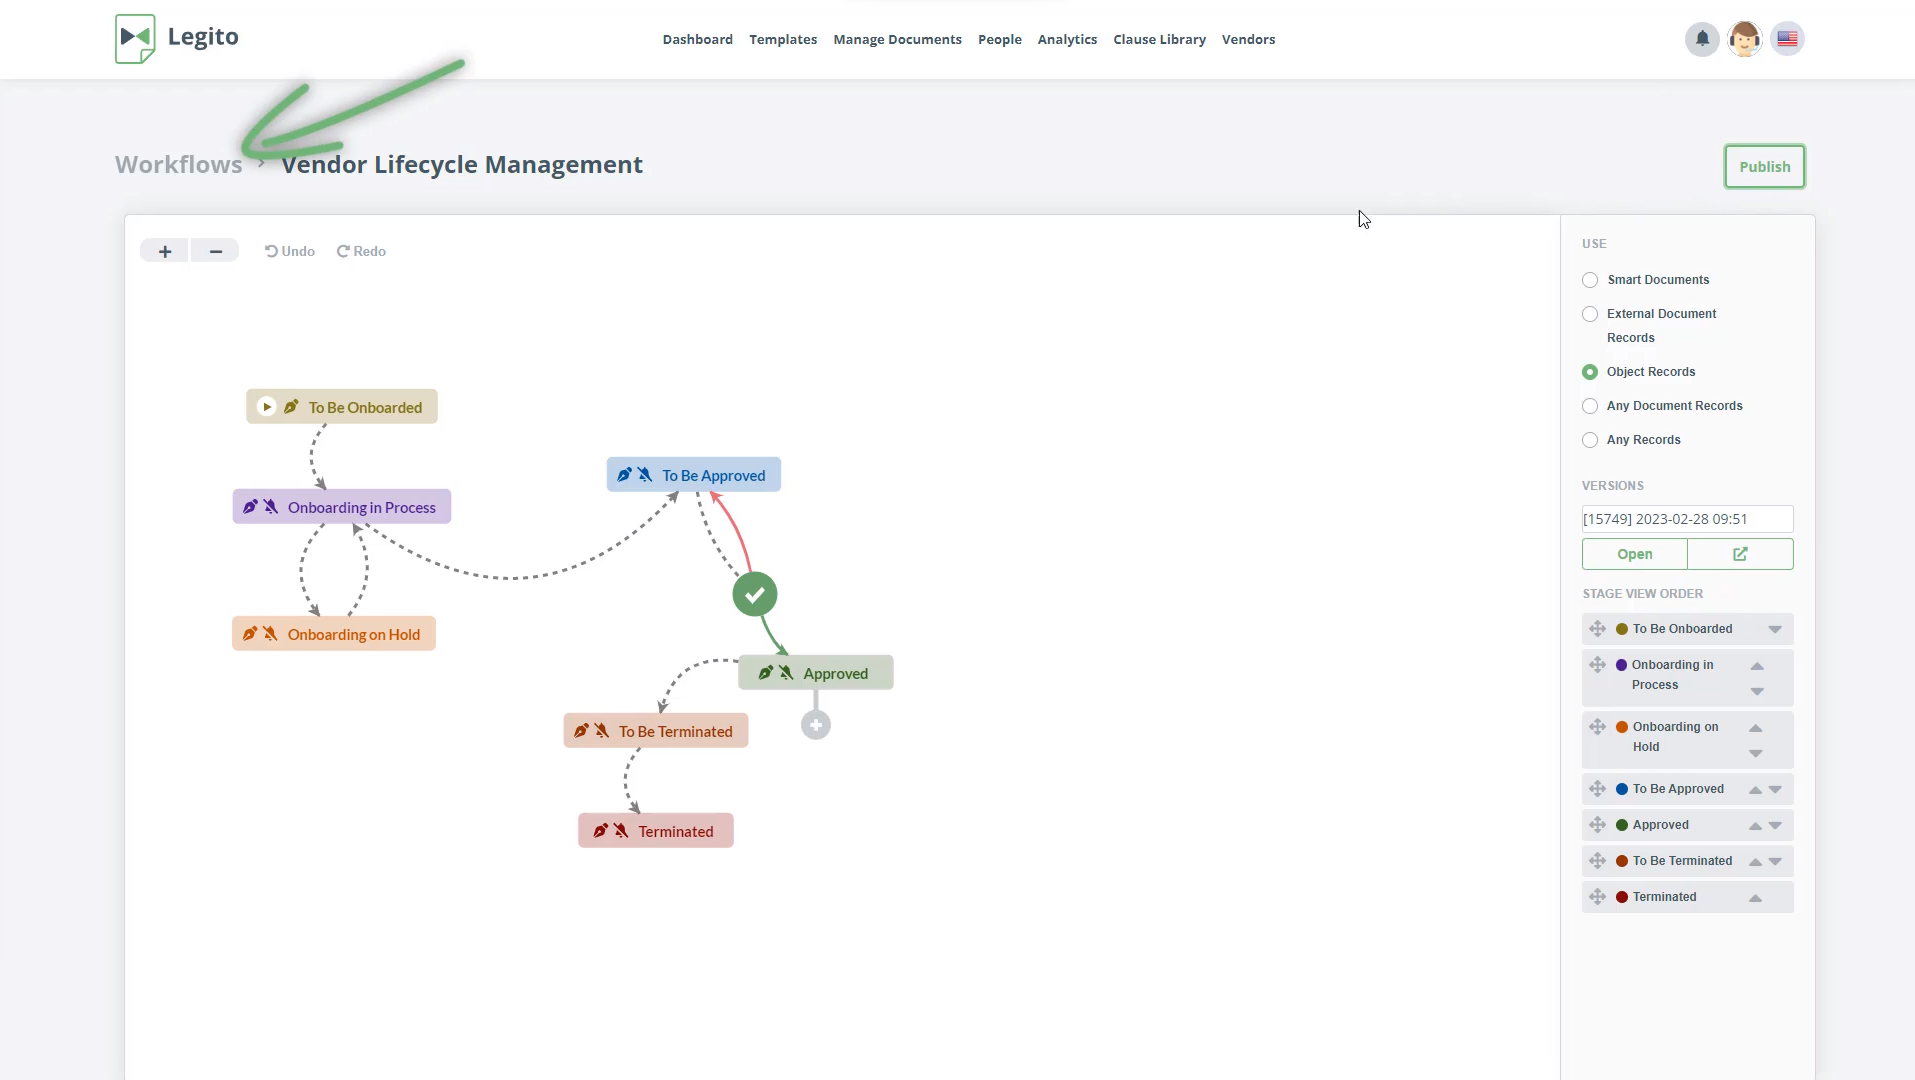
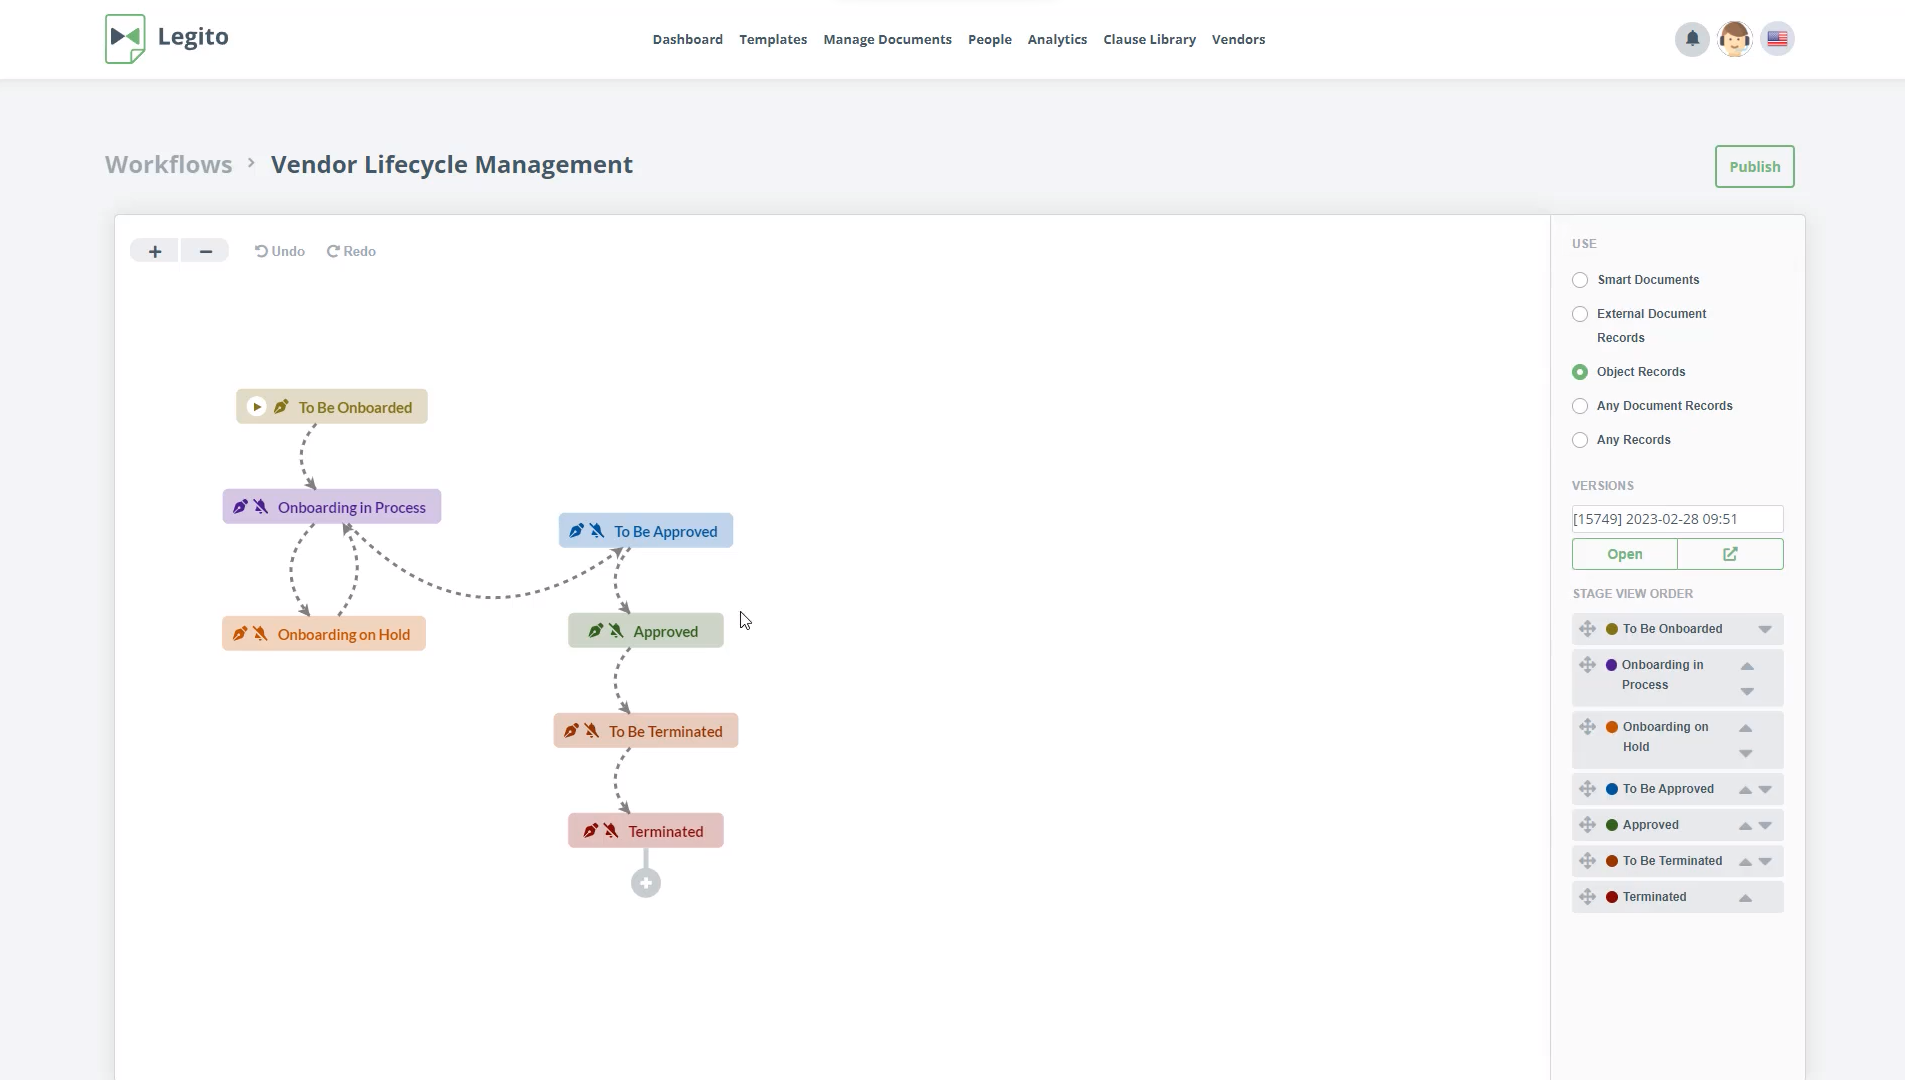
Step 2: Create the following Stages in the Workflow Editor
Create the following Stages in the Workflow Editor: To Be Onboarded, Onboarding in Process, Onboarding On Hold, To Be Approved, Approved, To Be Terminated, Terminated.
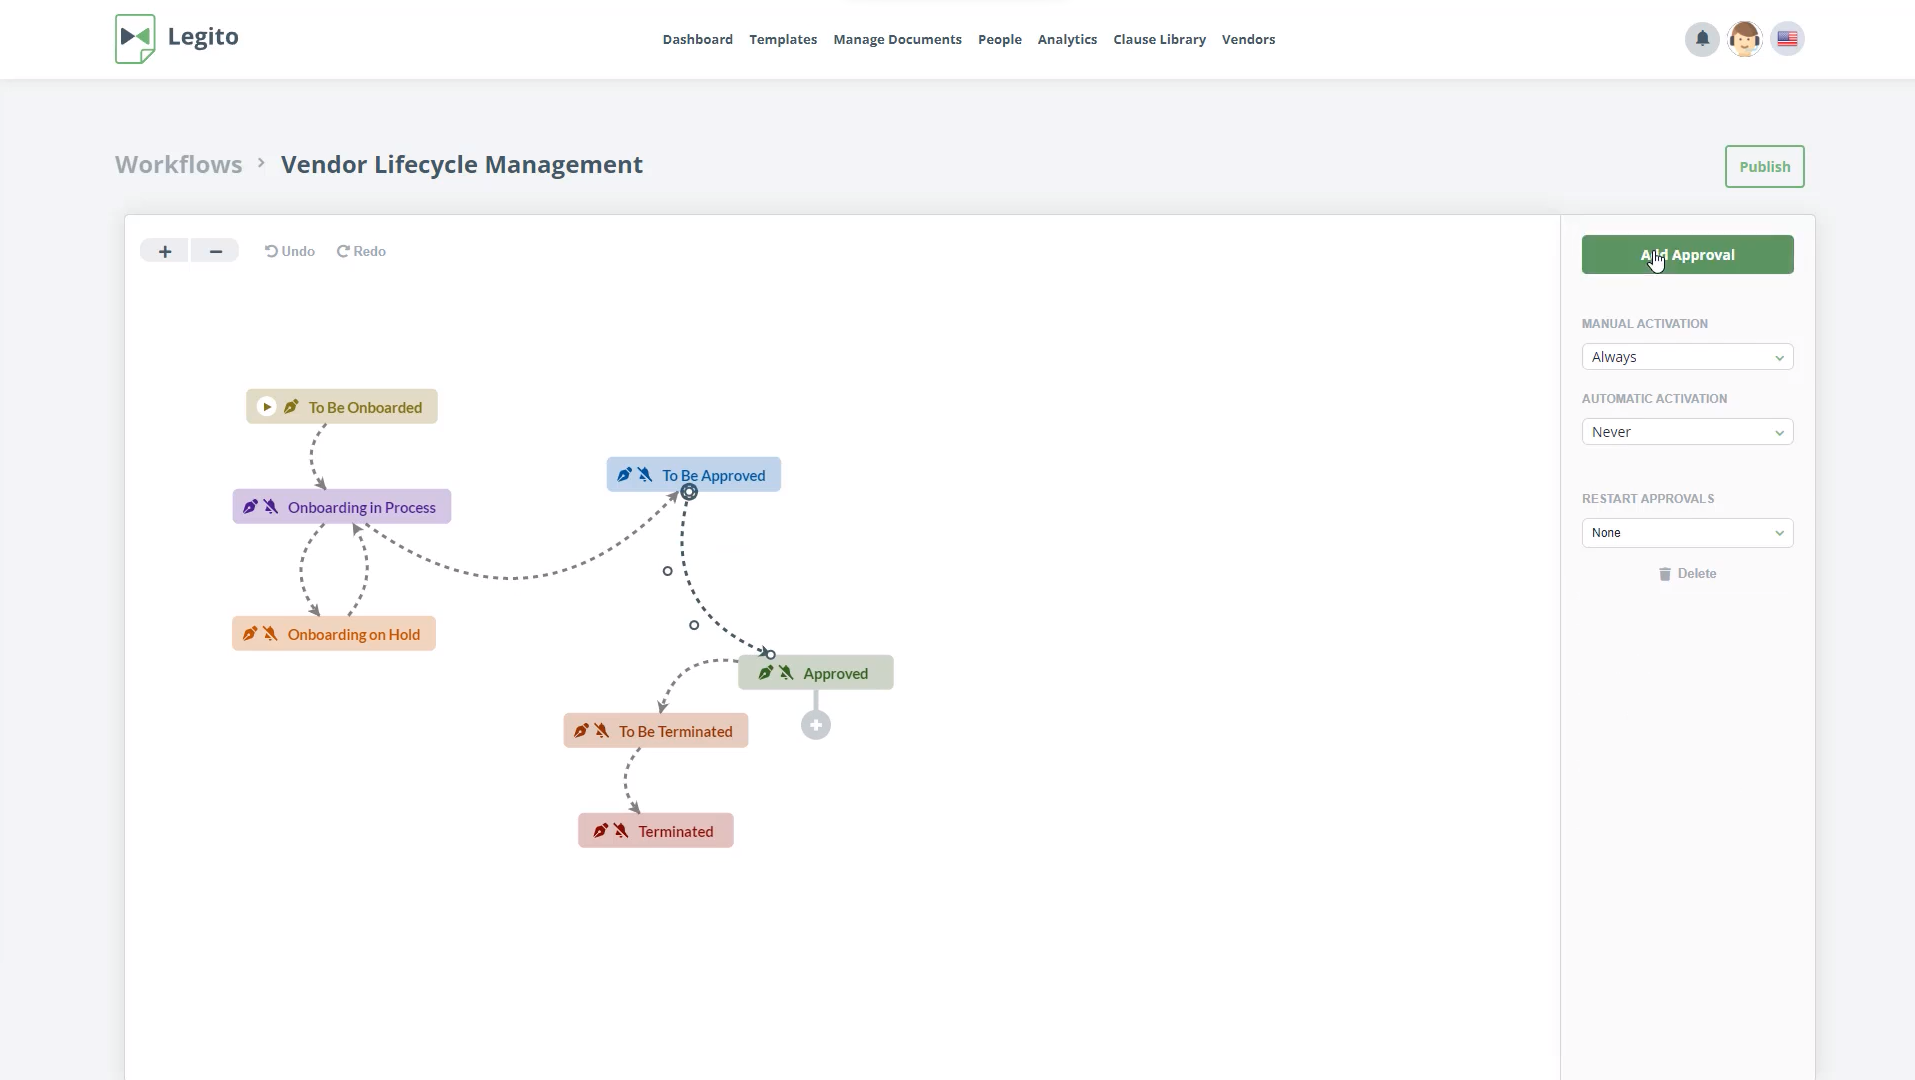
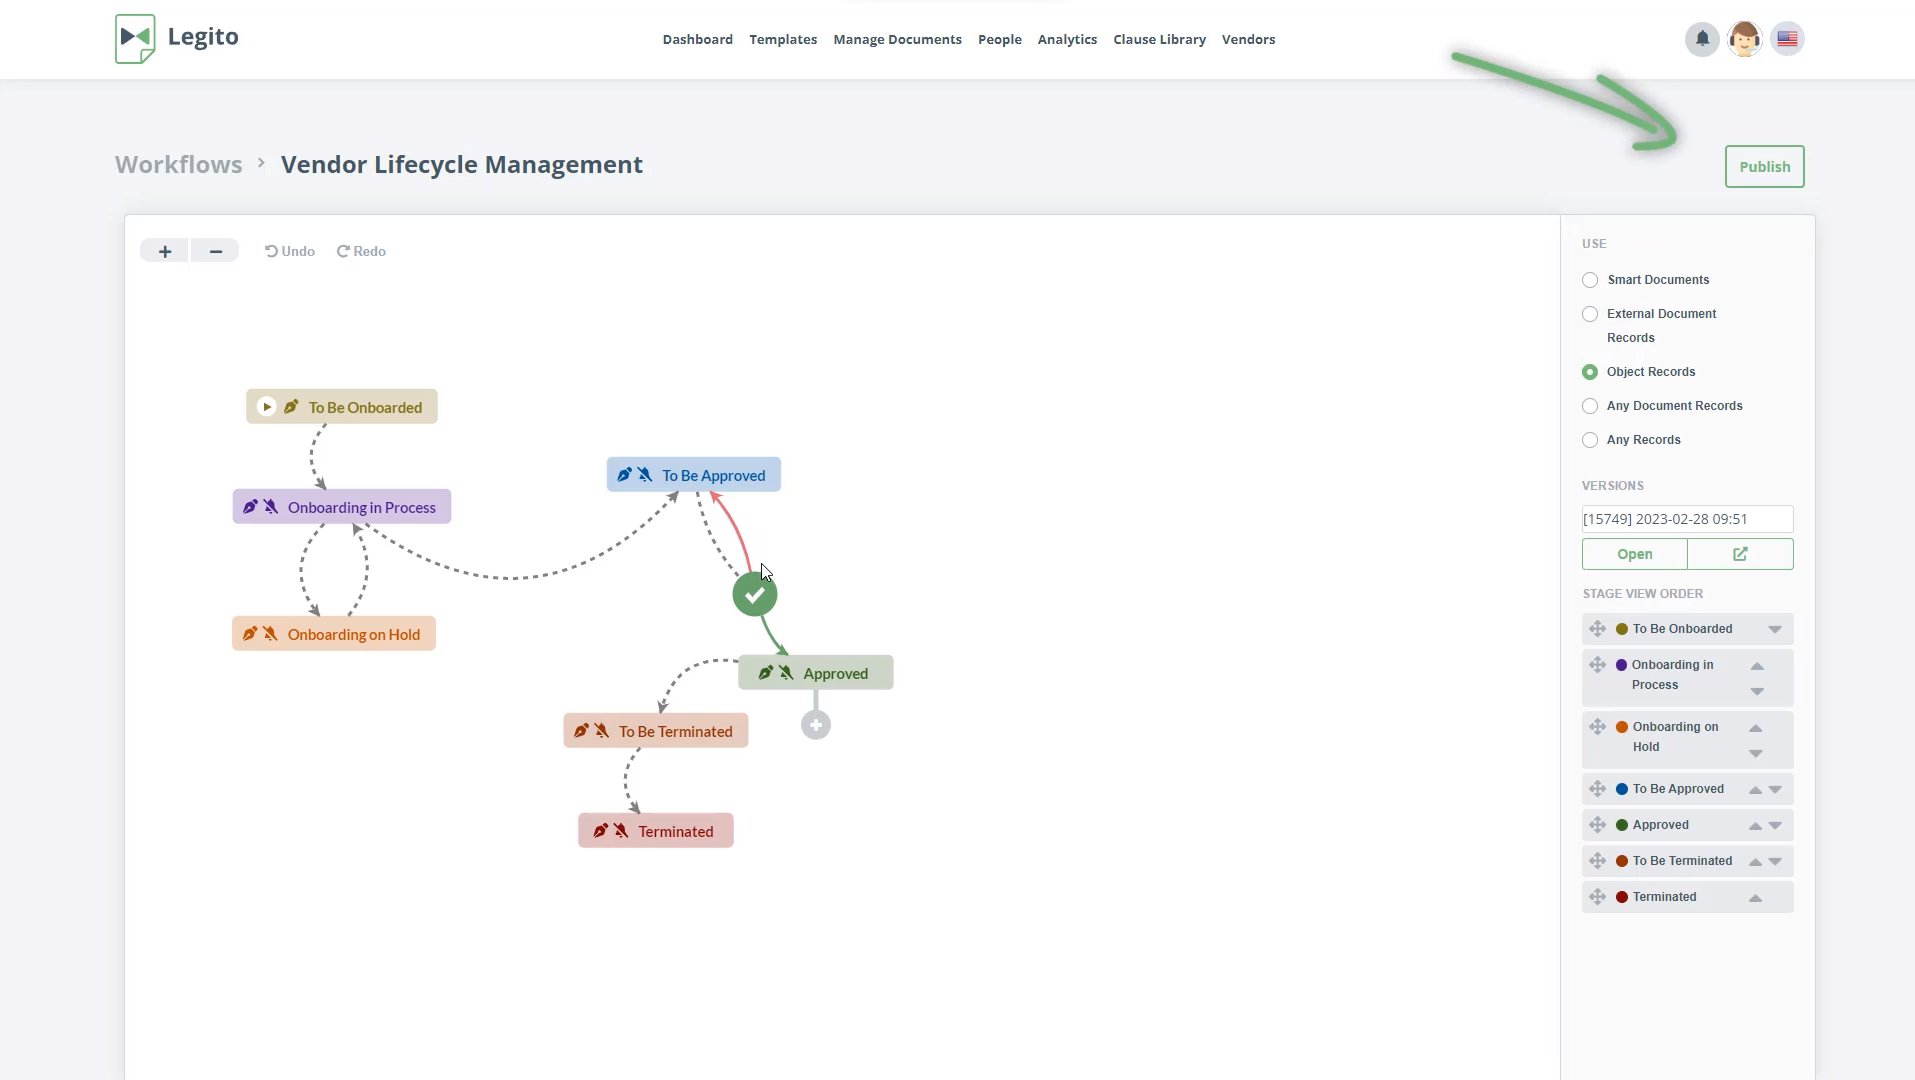
Create an Approval between Stages “To Be Approved” and “Approved” and Publish the Workflow.
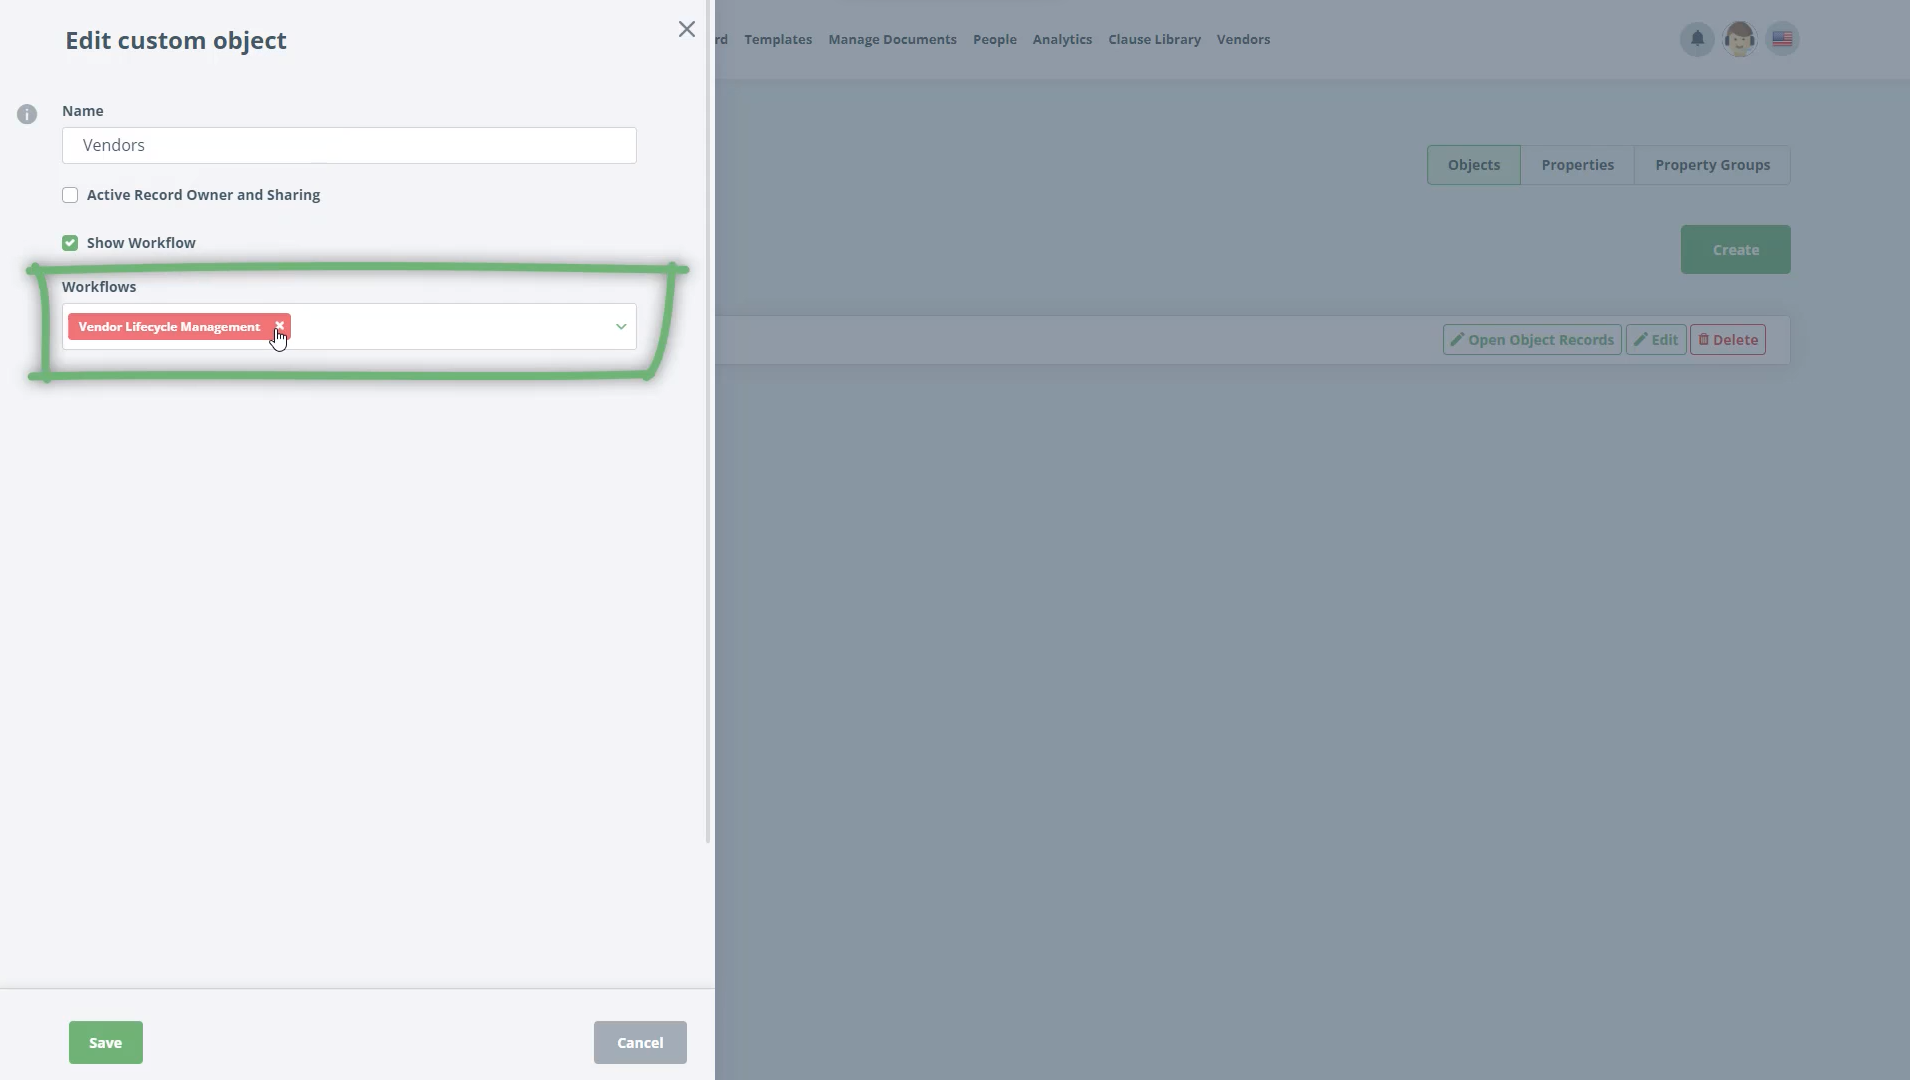
Step 3: Go back to the "Objects"
Go back to the Objects Section, Click Edit for the “Vendors” Object, activate Workflow for the Object
Assign the newly created Vendor Lifecycle Management Workflow to the Object and Confirm.