Document Drafting Automation Basics
Feel the magical moment when your first automated clause starts working, and you realize how much Legito can do for you.
 25 min | 13 Tasks
Task 3 Clause Structure: Inserting Articles and Paragraphs
Before you begin, copy the text below:
The Parties hereby express their consent to the security of the Loan by Guarantor (as defined in separate document) in line with Guarantor’s declaration.
Step-by-Step Guide
Step 1: Learn the Structure Basics of Clauses
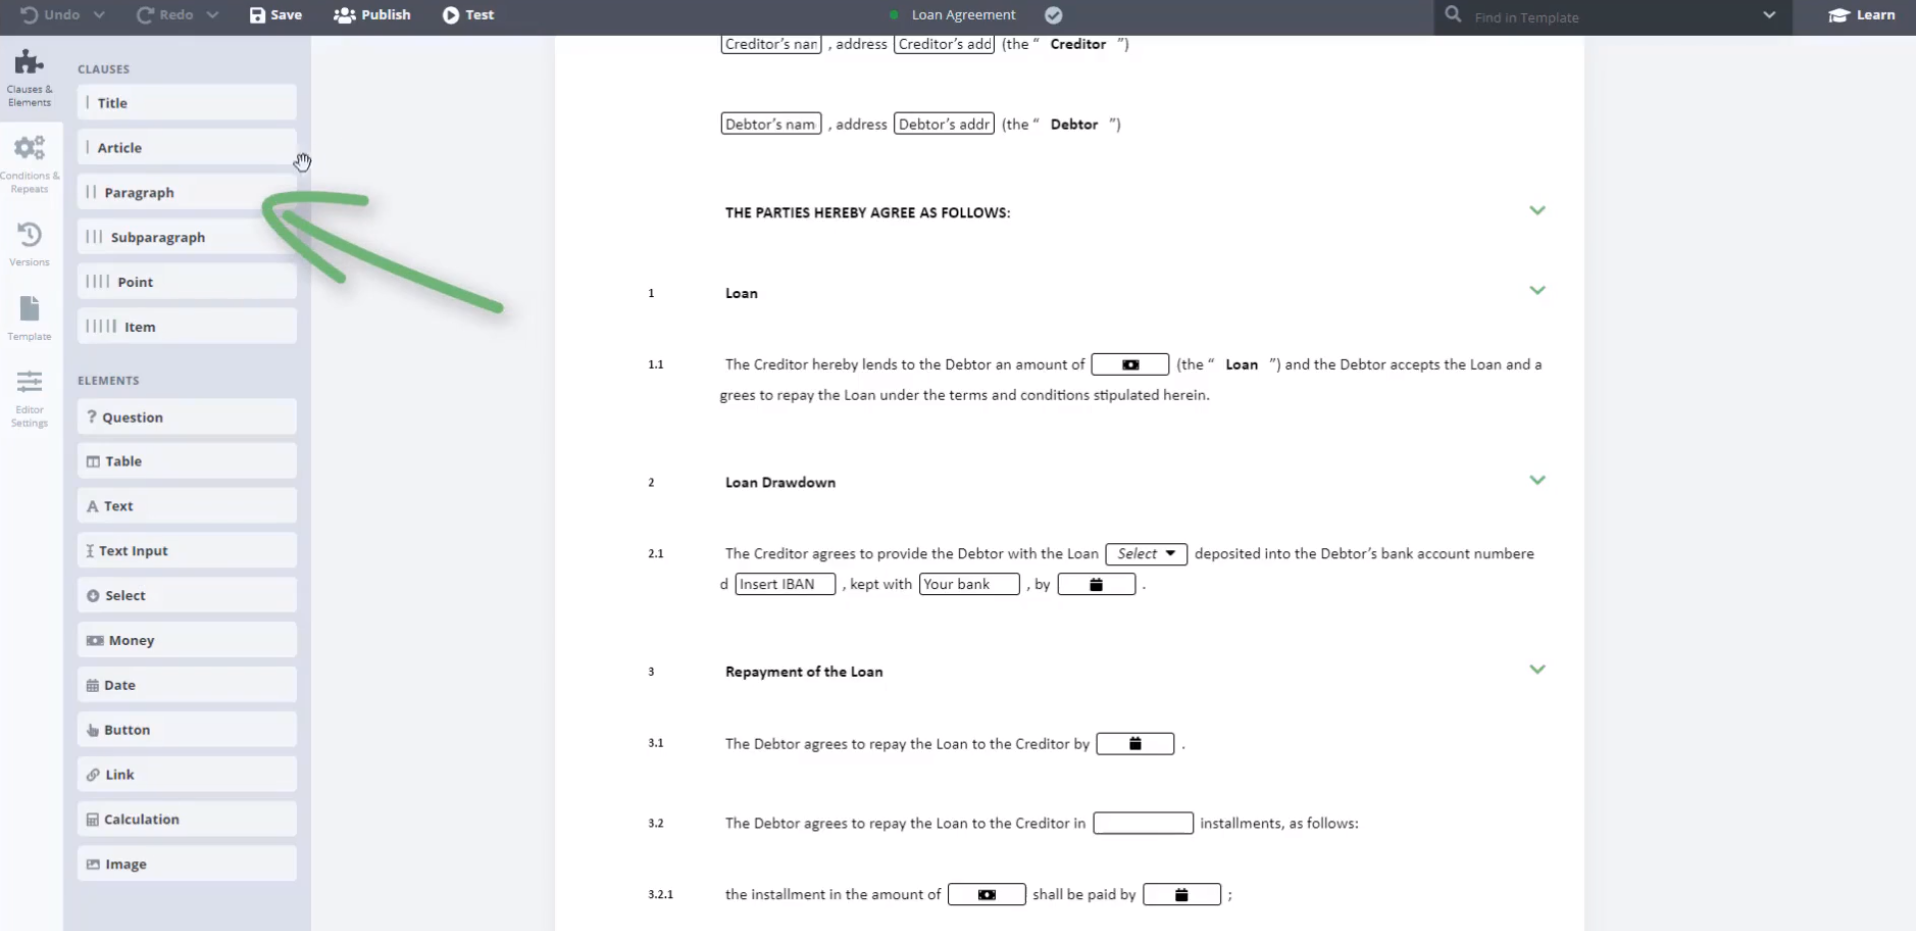
Once in Legito Editor, you will notice a horizontal menu bar on the top of the browser window. The menu bar contains the primary operations for saving and testing, as well as a Search bar on the right. On the left you will find a panel bar with five items, with the Clauses & Elements currently selected. In the panel, there are a series of rectangular boxes (Widgets). These are separated into two groups: Clauses & Elements. In this task, we will explore how Clauses work in Legito. You will also use widgets which are easily added to your Template simply by clicking, dragging, and dropping the widget to the desired place within the template.
Clauses are structural containers. Elements or other Clauses are added into a Clause to build the structure of a document. Clause structure hierarchy in Legito Template Editor is as follows:
| Titles
| Articles
|| Paragraphs
||| Subparagraphs
|||| Point
||||| Item
For example, if you move your cursor over section 1 (Loan), you will note the dotted line border that appears around the Article in section 1 the Paragraph 1.1. A menu of three buttons will appear on each Clause container at the top left, with a delete button on the top right.
Additional Clause basics:
- Best practice is to first add an Article, and then place Paragraphs, Subparagraphs, etc., within that Article.
- Conditions, Functions, or Rules applied to any “senior” level of a Clause will “trickle-down” to all “child” levels of that Clause.
- A Title cannot be placed within an Article.
- Articles, Paragraphs, and Clauses automatically include a “Text” Element, which allows users to enter text.
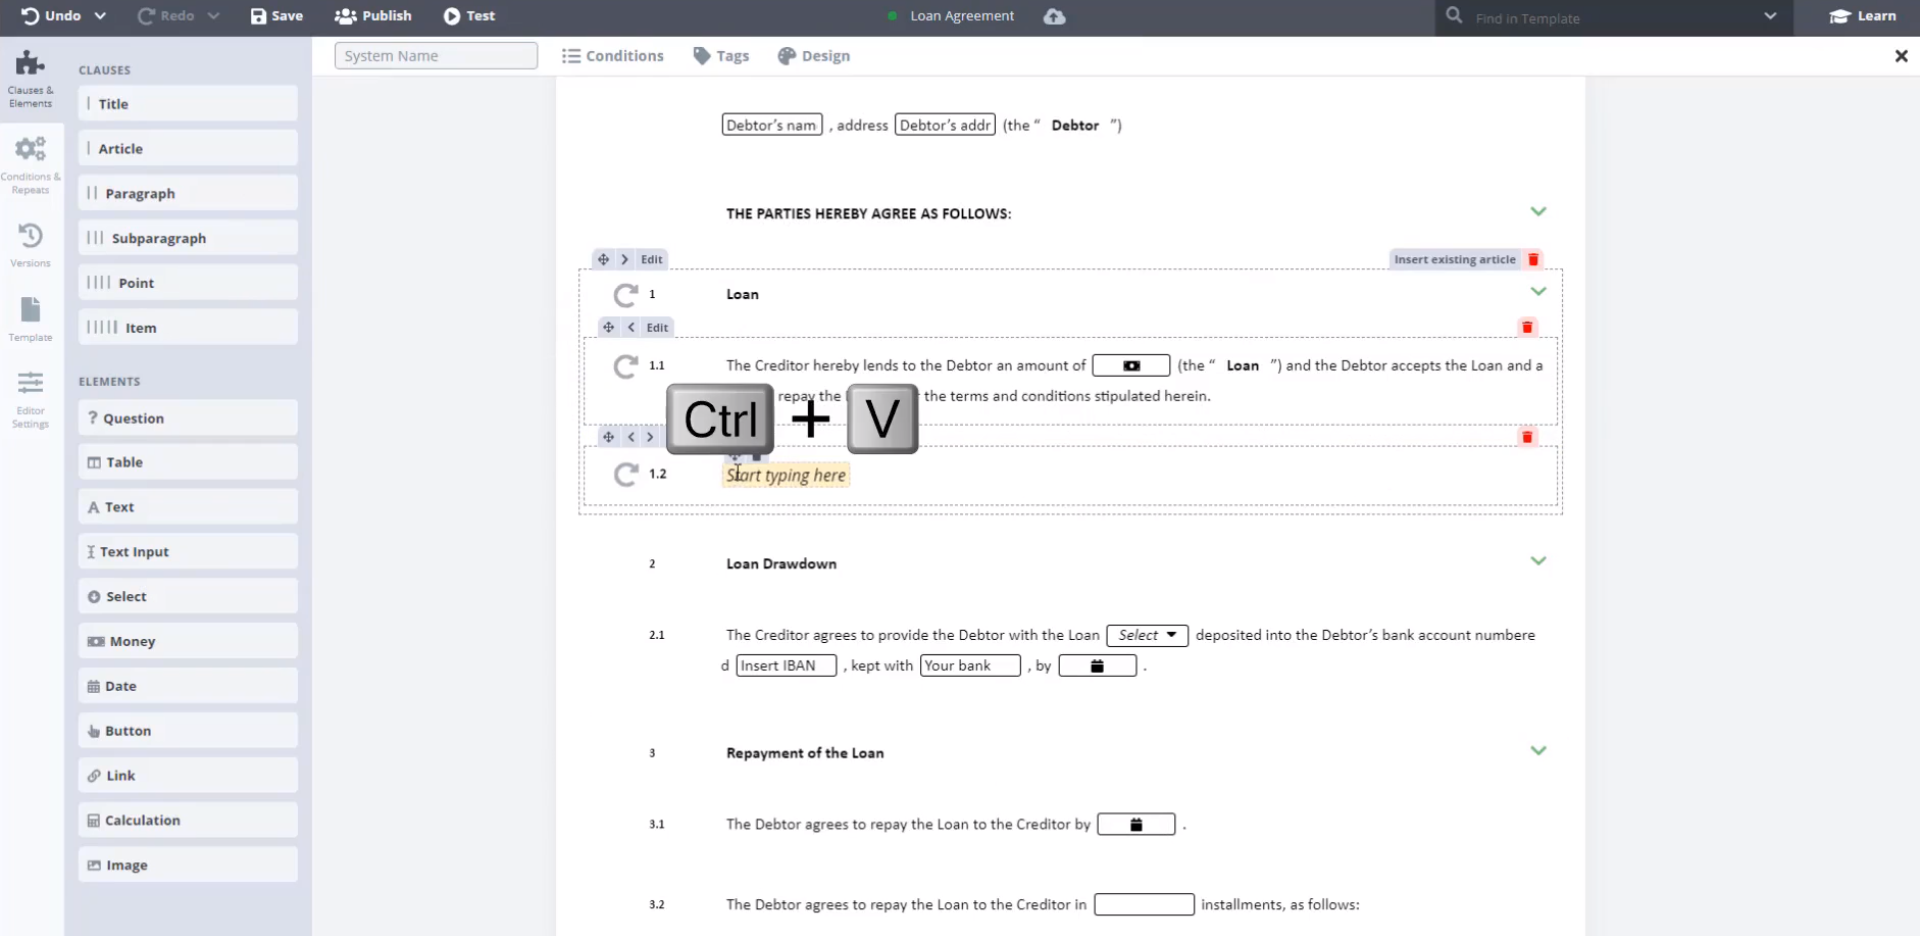
Step 2: Add Paragraph 1.2
Click and Drag the Paragraph 1.2 widget to the Template Editor Page, placing it within Article 1, underneath Paragraph 1.1.
Step 3: Add following text to Paragraph
Copy and Paste the following text into the new Paragraph 1.2:
The Parties hereby express their consent to the security of the Loan by Guarantor (as defined in separate document) in line with Guarantor’s declaration.
Step 4: See how Legito prevents errors when inserting clauses
When you drag a Paragraph (or any other type of Clause) onto the agreement, you will see that Legito won’t let you drop the clause into the wrong place. For example, Legito will not let you drag and drop a Title into the middle of a Paragraph. If you drag and drop a new Paragraph, it must be dropped before or after an existing Paragraph (not in the middle of the text of a Paragraph).
This is an example of Legito helping you to avoid mistakes.
If you are unsure about the structure of a template, move your mouse over the document and notice how Legito uses a thin dotted line to group clauses and ‘child’ clauses.