OAuth 2.0 authentication with Azure Active Directory
Step-by-step guide on Legito’s Azure AD Integration
The OAuth 2.0 is the industry protocol for authorization. It allows a user to grant limited access to its protected resources. Designed to work specifically with Hypertext Transfer Protocol (HTTP), OAuth separates the role of the client from the resource owner. The client requests access to the resources controlled by the resource owner and hosted by the resource server. The resource server issues access tokens with the approval of the resource owner. The client uses the access tokens to access the protected resources hosted by the resource server.
OAuth 2.0 is directly related to OpenID Connect (OIDC). Since OIDC is an authentication and authorization layer built on top of OAuth 2.0, it isn’t backwards compatible with OAuth 1.0.
Legito supports integration with Azure Active Directory (Azure AD) only with Authorization Code flow.
Authorization Code flow
Because Legito application is server-side application where the source code is not publicly exposed, they use the Authorization Code flow (defined in OAuth 2.0 RFC 6749, section 4.1), which exchanges an Authorization Code for an Access Token.
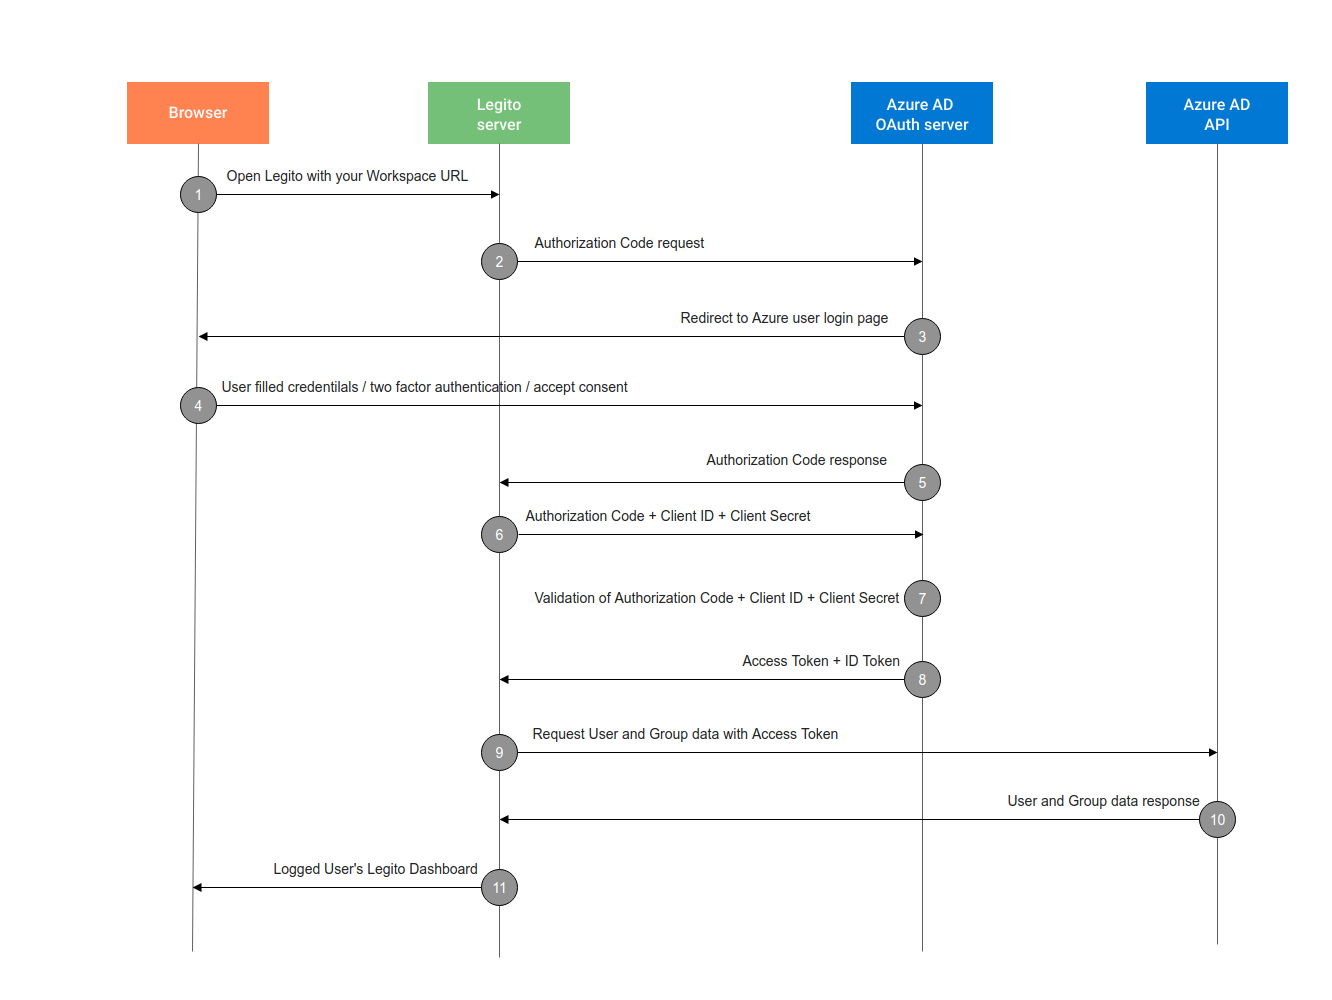
How it works
- The User opens Legito application with their Workspace URL (e.g. https://mycompany.legito.com).
- Legito server redirects the User to the Azure Active Directory OAuth Authorization Server
Authorization Server redirects the User to the login page. - The User authenticates his credentials, makes Two factor authentication (if your organization requires it) and accepts authorization prompt.
- Azure Authorization Server redirects the user back to the application with an authorization code, which is good for one use.
- Legito server sends this code to the Azure Authorization Server along with the application’s Client ID and Client Secret.
- Azure Authorization Server verifies the code, Client ID, and Client Secret.
- Azure Authorization Server responds with an ID Token and Access Token (and optionally, a Refresh Token).
- Legito application uses the Access Token to call an API to access information about the user and user groups.
- The API responds with requested data.
- User is logged with a matched Role and is redirected to Workspace Dashboard

Configuration
Prerequisites
- In Legito you must have your Workspace on a separate domain (e.g. https://mycompany.legito.com). If you do not already have this, please contact Legito support.
- In Azure Active Directory you must have an administration account in AD and you must have created an Enterprise application in AD.
Configuration procedure
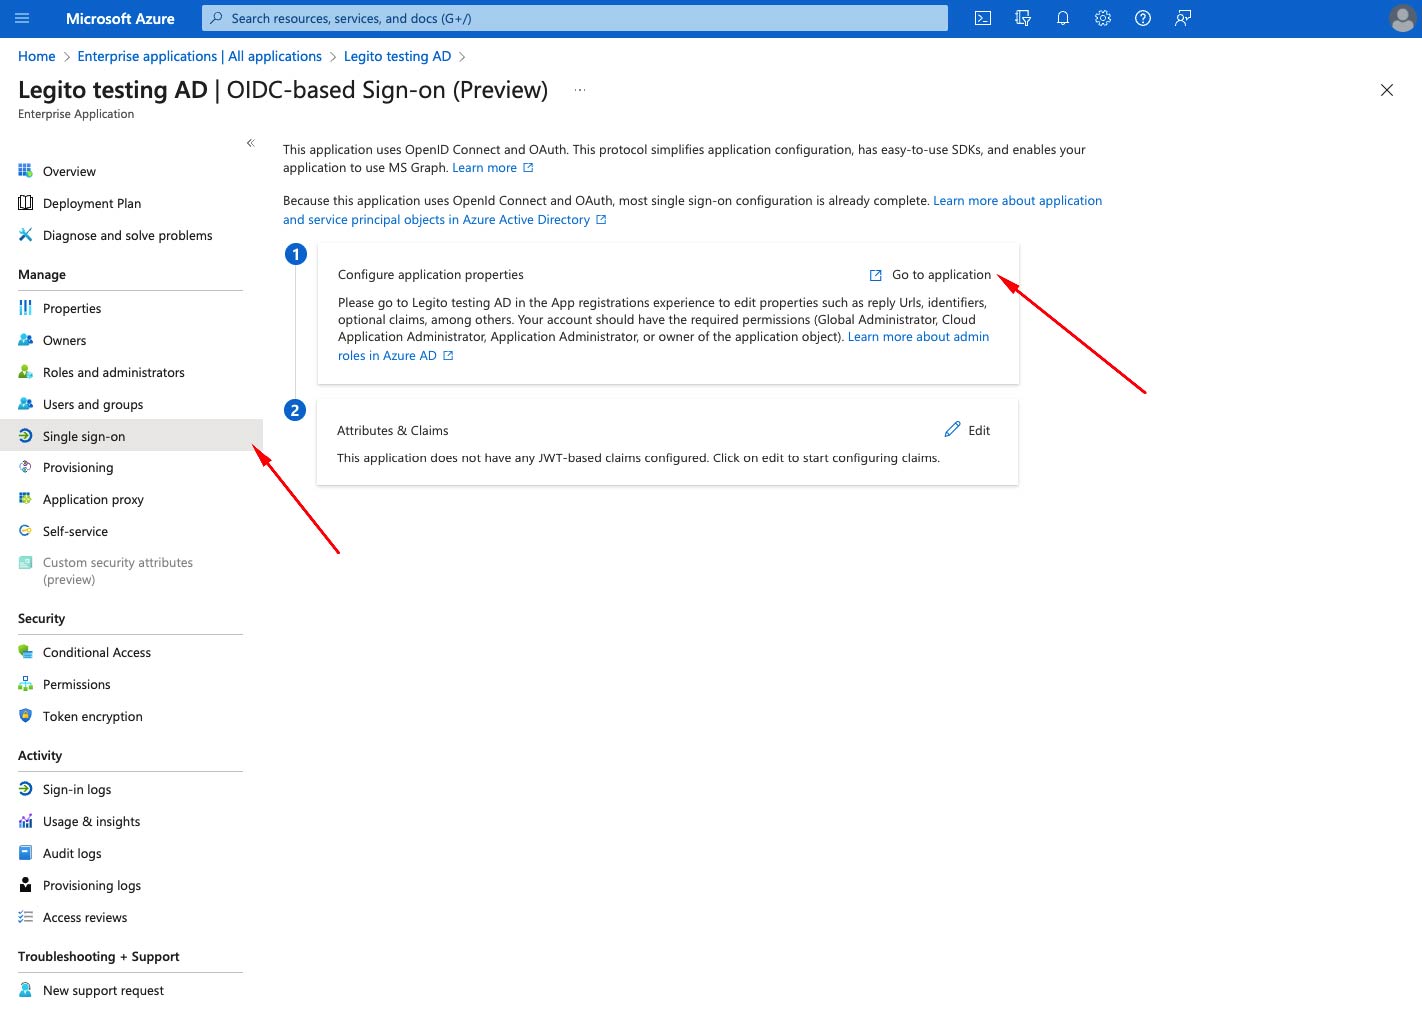
- In your application in Azure Active Directory select Single sign-on from Manage menu bar and click Go to application

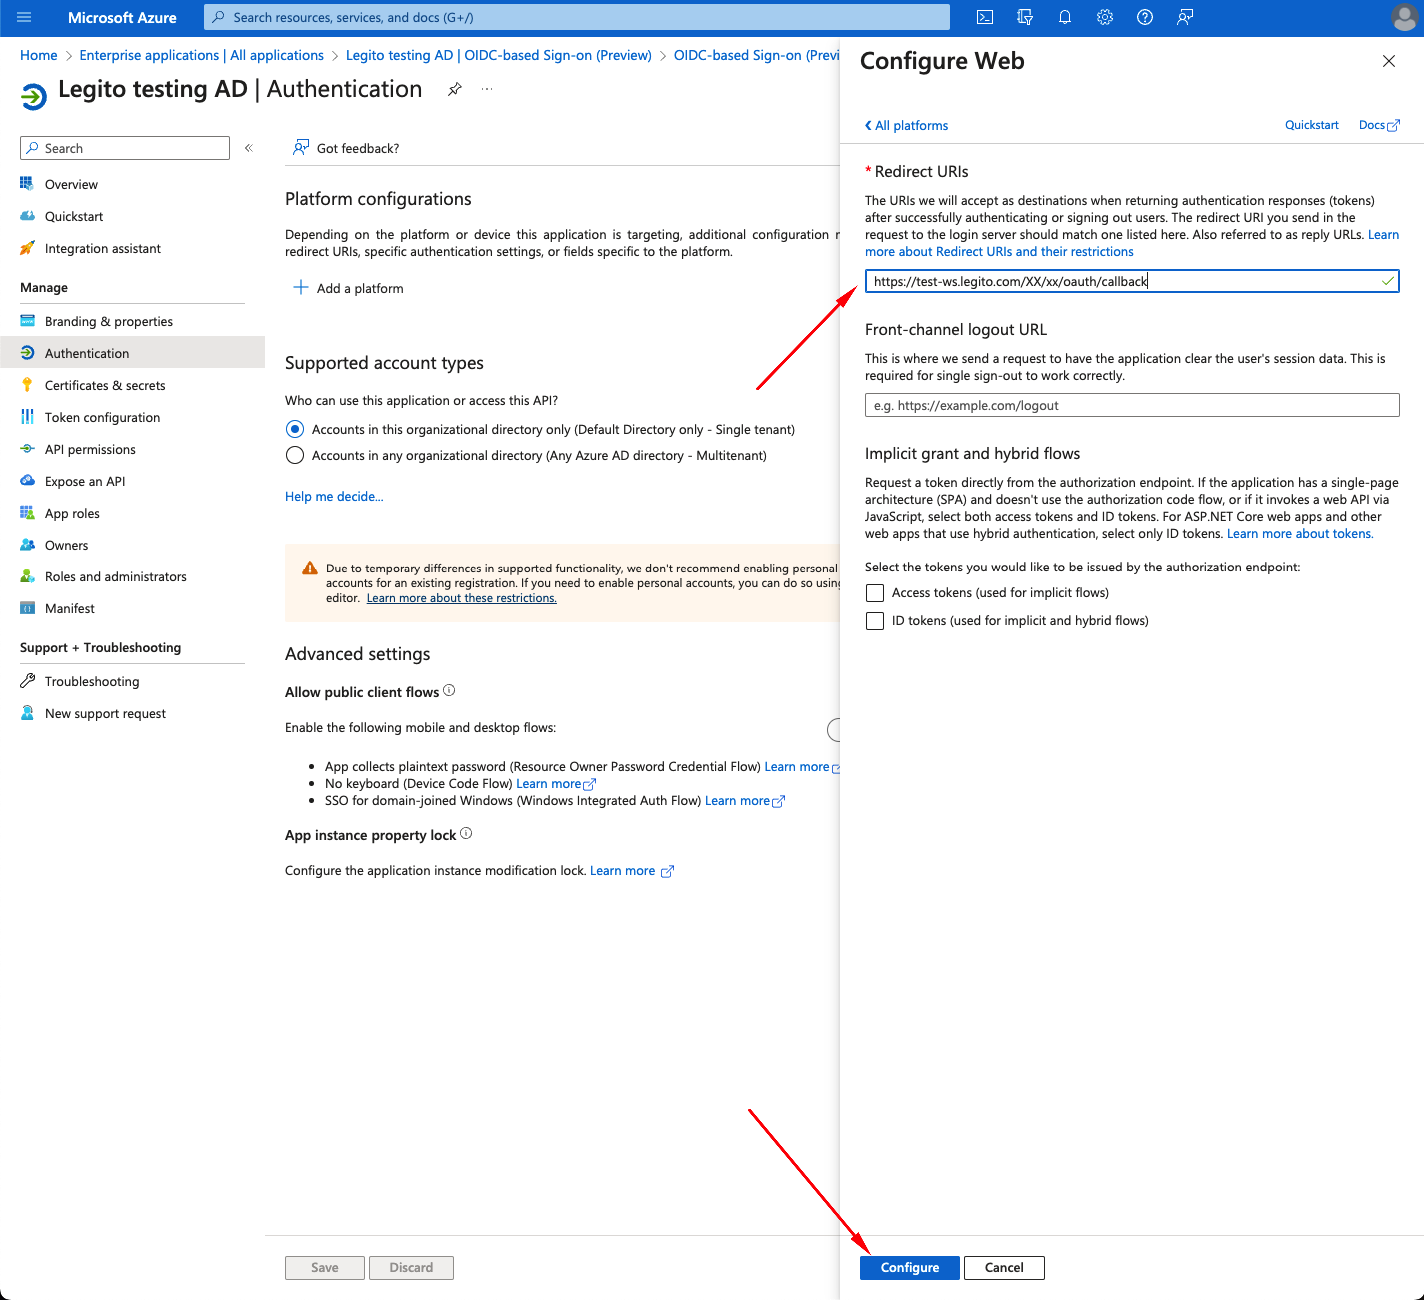
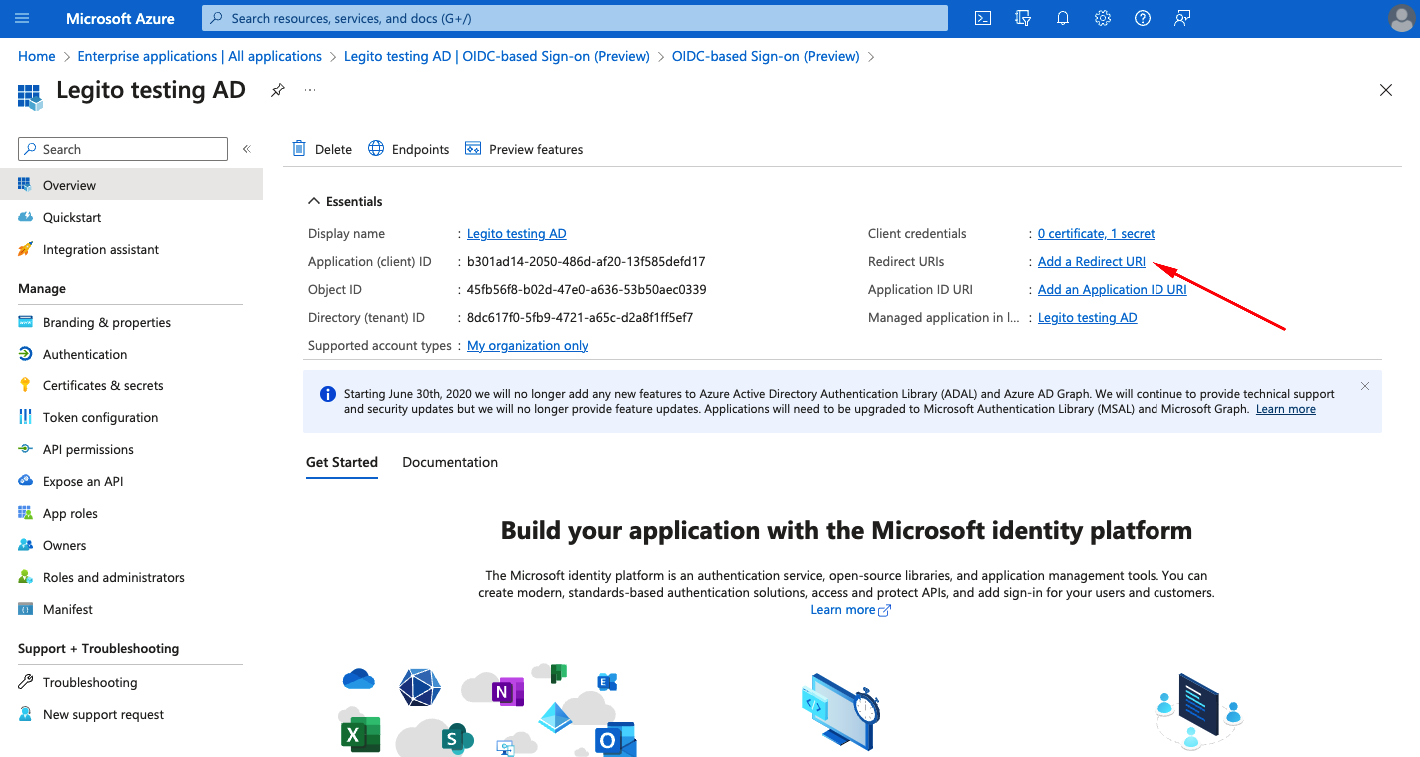
- Click on Add a Redirect URI.

- Click on Add a platform.
- From left bar select Web.

- To Redirect URIs write your domain redirect URI in form of https://{mydomain}.legito.com/XX/xx/oauth/callback (e.g. https://mycompany.legito.com/XX/xx/oauth/callback if your Workspace domain is mycompany.legito.com)
- Click Configure
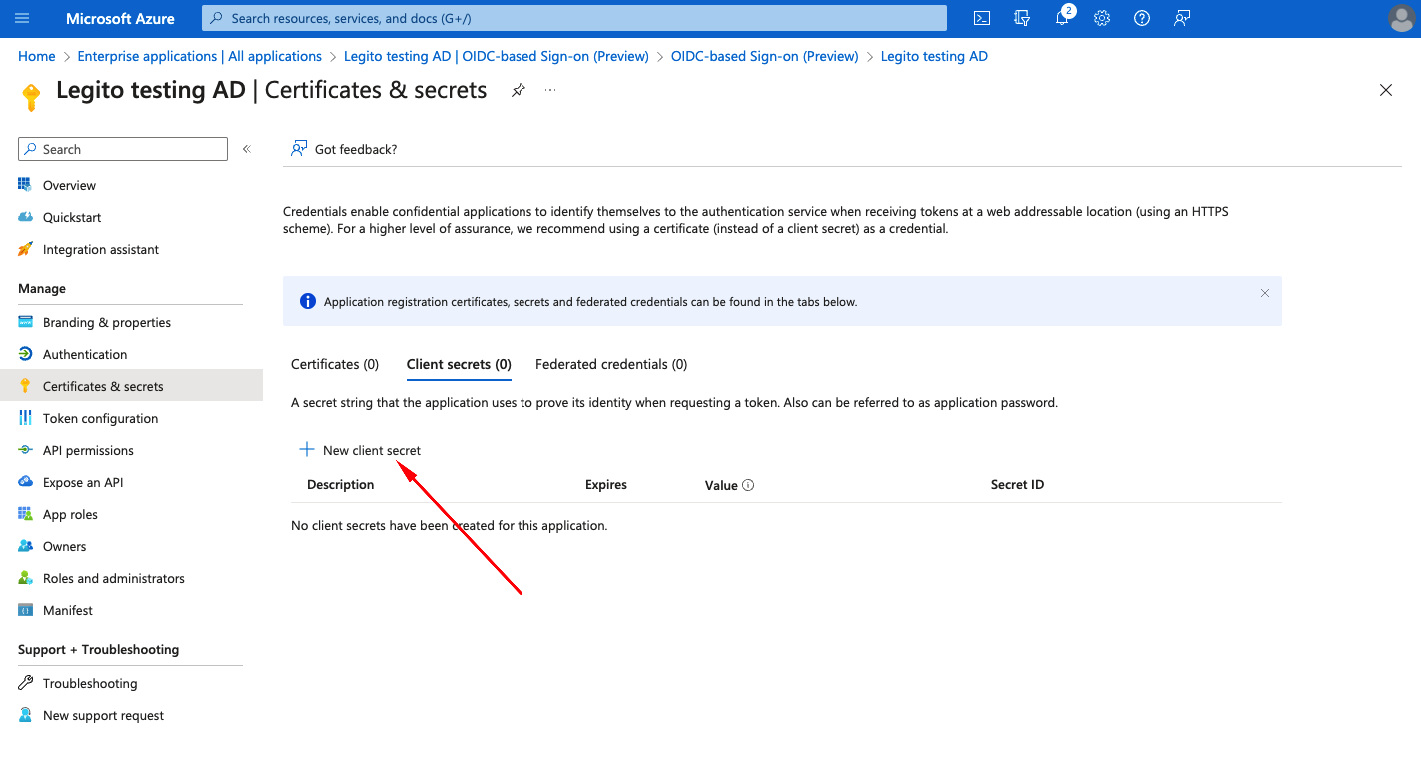
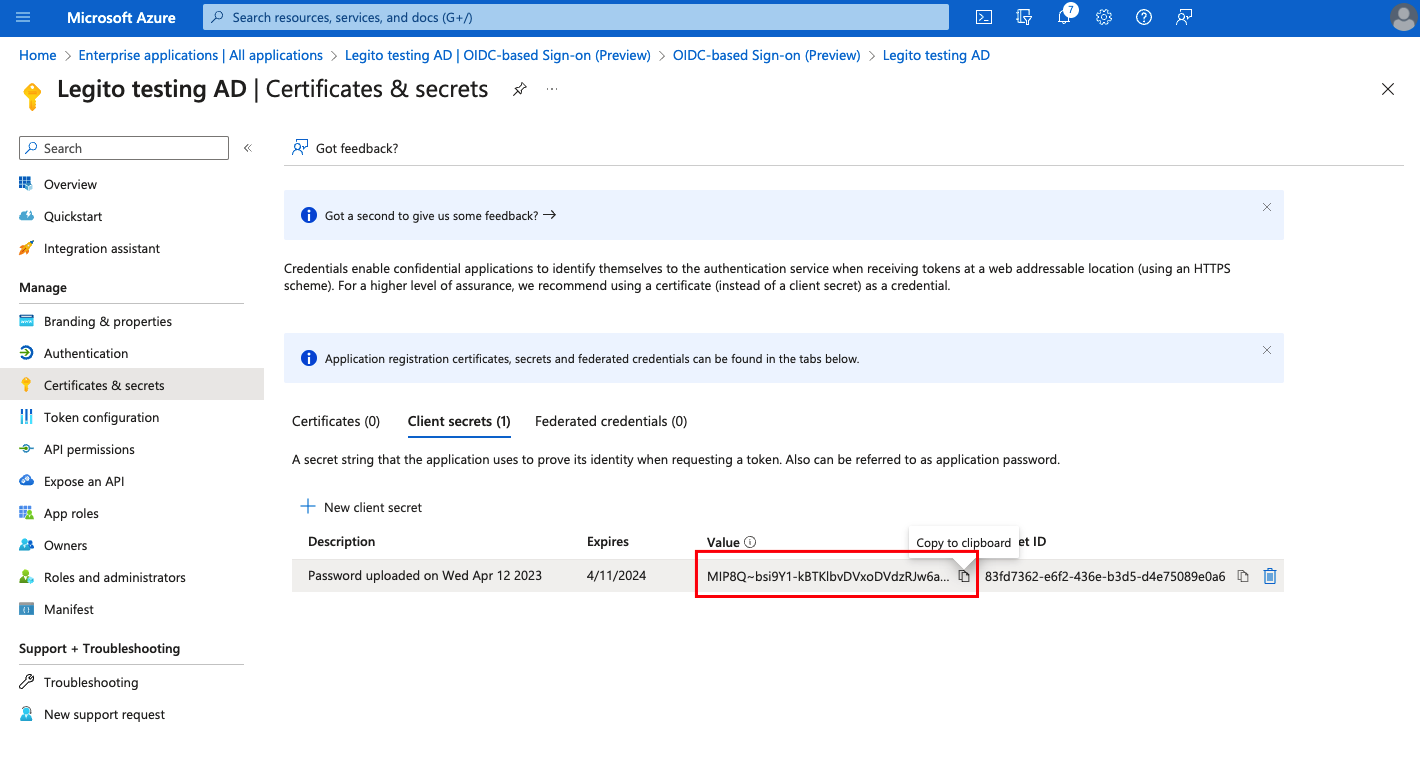
- Select Certificates and secrets from Manage menu bar
- On Client secrets tab click on + New client secret
- Set secret Expires based on your company policies (e.g. 356 days)
- Click Add
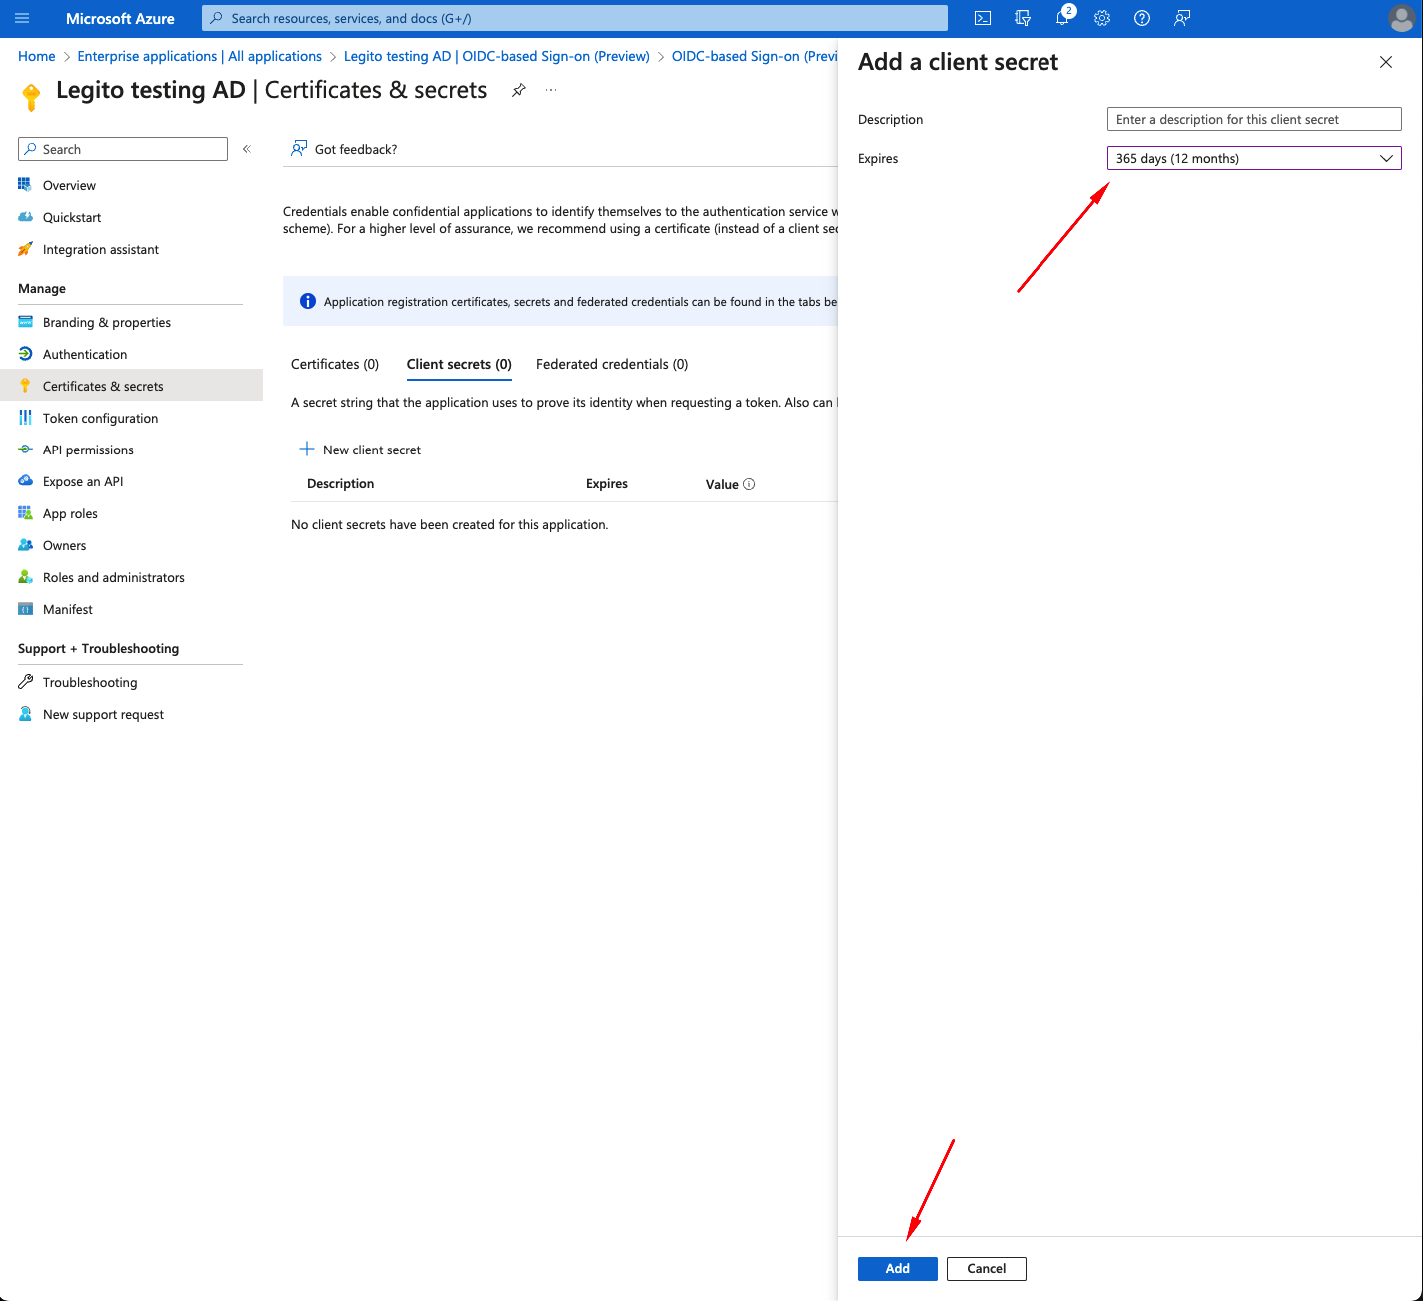
- Copy your secret Value
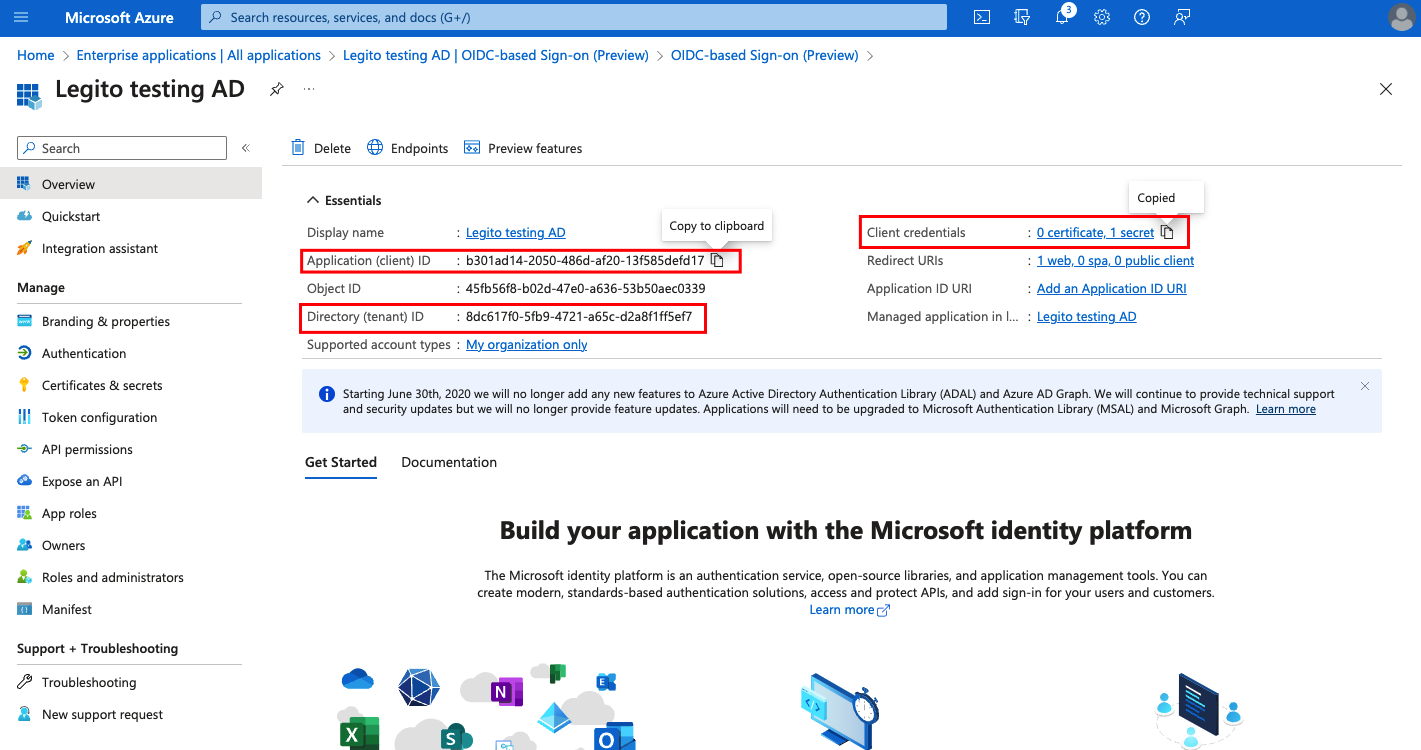
- Copy your Client ID and Tenant ID
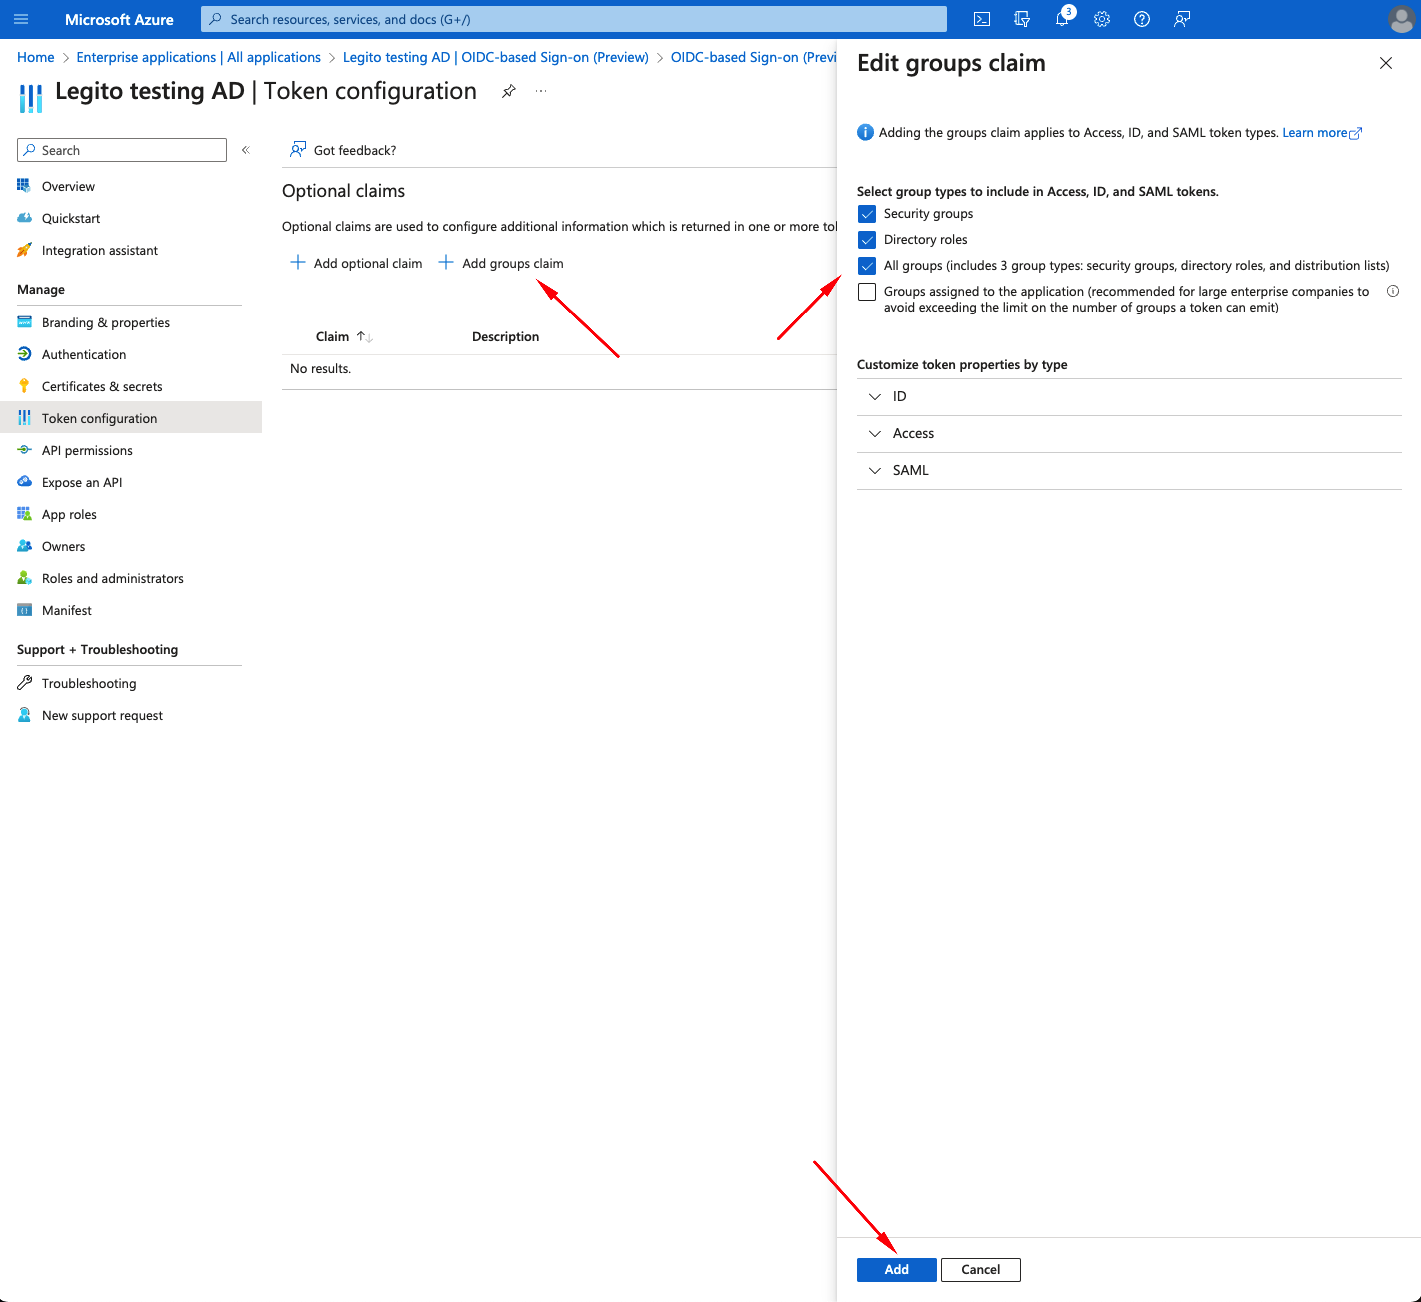
- Select Token configuration from Manage menu bar
- Click +Add group claim
- Select options based on your company policies (e.g. All groups)
- Click Add
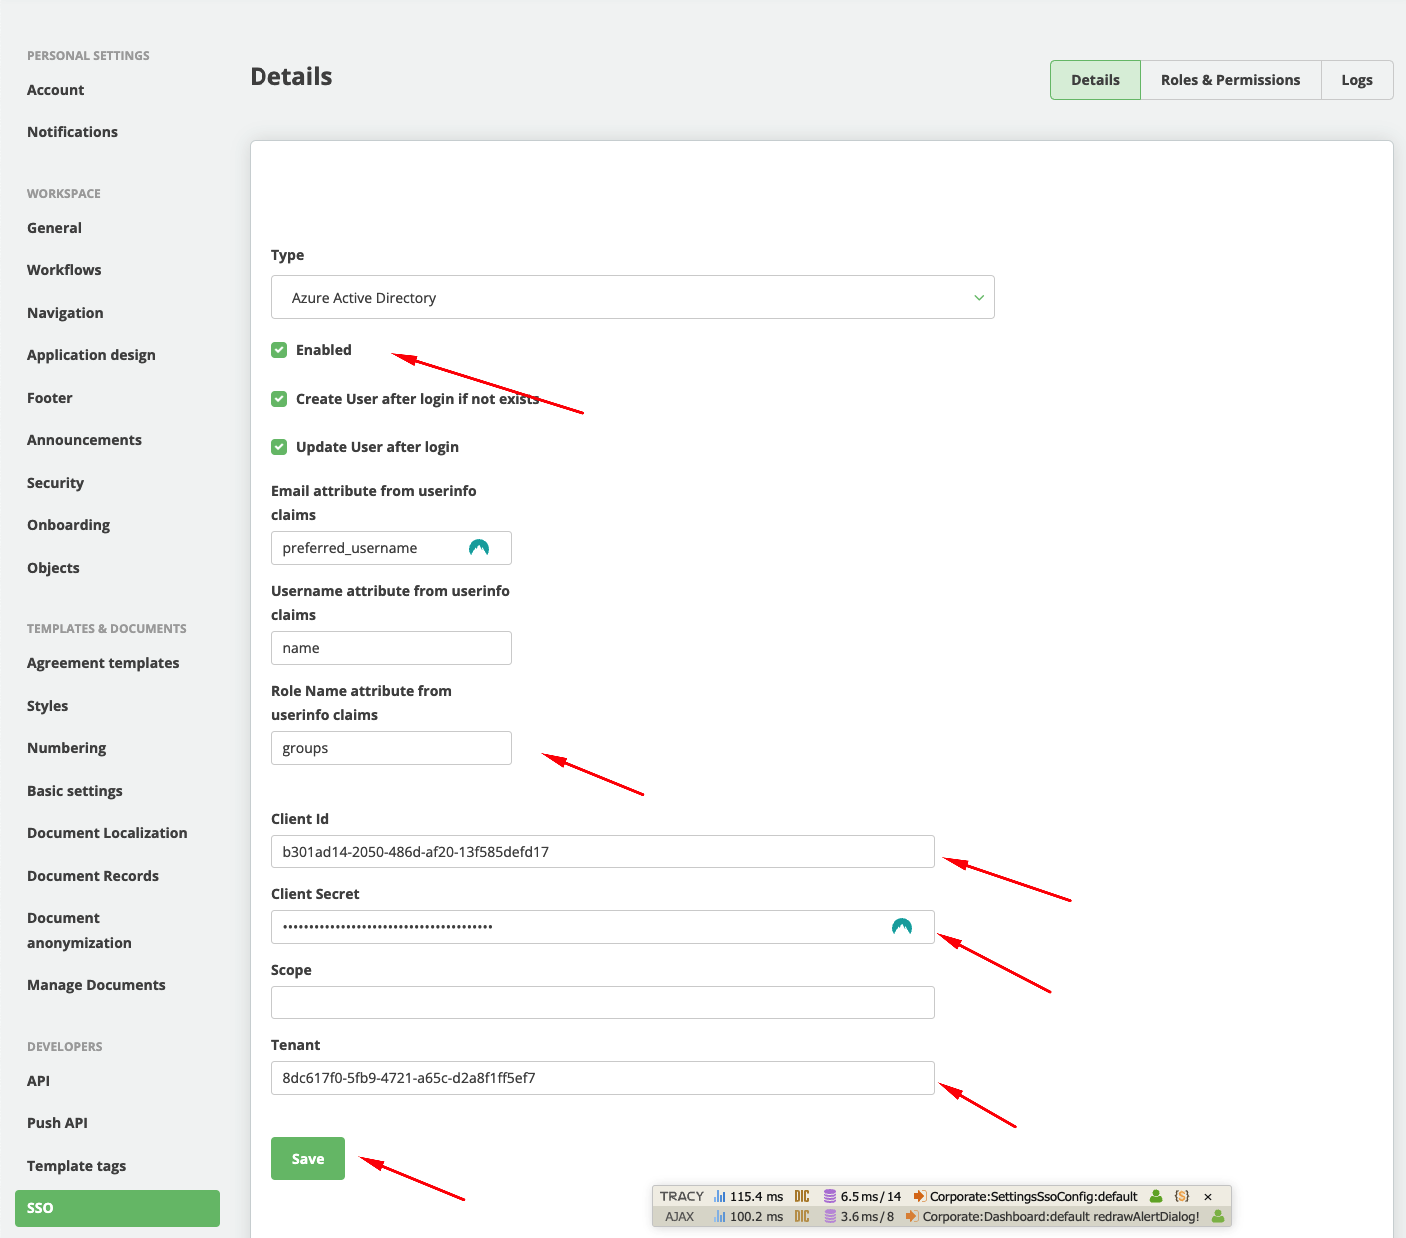
- In Legito select SSO configuration from Settings menu
- From Type select choose Azure Active Directory
- Choose Enabled setting
- To Role Name attribute from userinfo claims setting write “groups”
- To Client ID setting copy Client ID from previous step
- To Client Secret setting copy Secret Value from previous step
- To Tenant setting copy Tenant ID from previous step
- Click Save
Warning: do not log out or close your browser until you are sure that the information you have entered is correct.
- Open your browser in anonymous mode and enter your Workspace URL.
- If everything is correct the User should be redirected to the Azure Active Directory and after a successful login the User should see their Dashboard.
- In case of problems, please contact Legito support
Roles
SSO settings support pairing with roles and groups from Azure AD.
In Legito, you can create any number of SSO roles with different settings.
By default, there is one default group whose settings are applied to all user logins (unless this feature is disabled).
Adding a new role
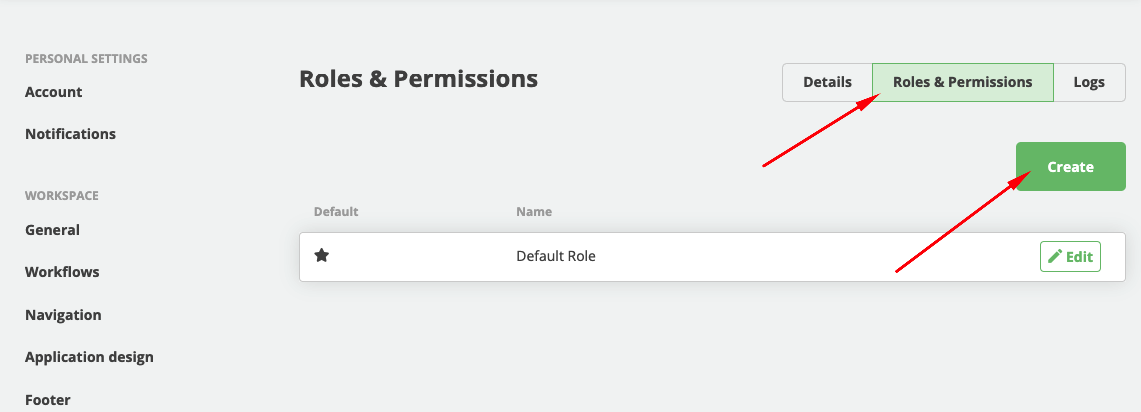
- In SSO settings click on Roles & Permissions tab
- Click on Create button
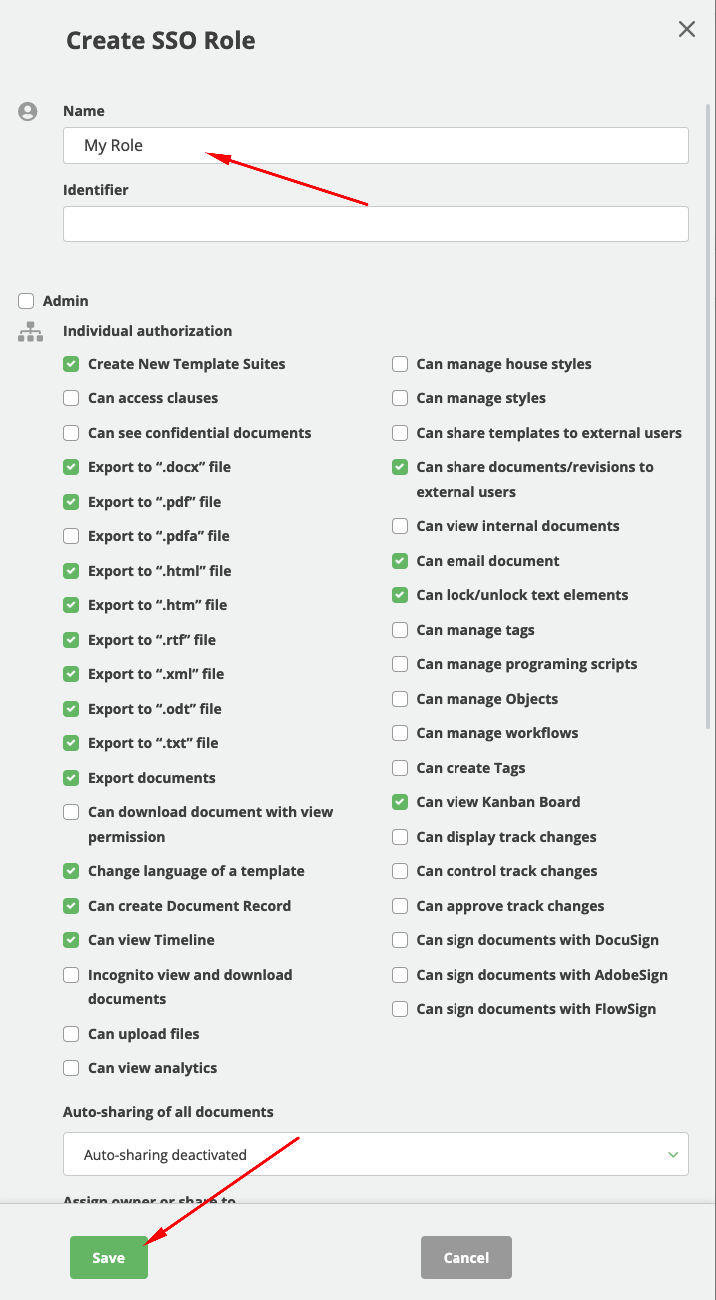
- Use your role naming in Name field
- Set the individual role settings according to your preferences
- Click on Save button
Pairing Role with Azure AD Group
- In Azure AD select Groups from left menu
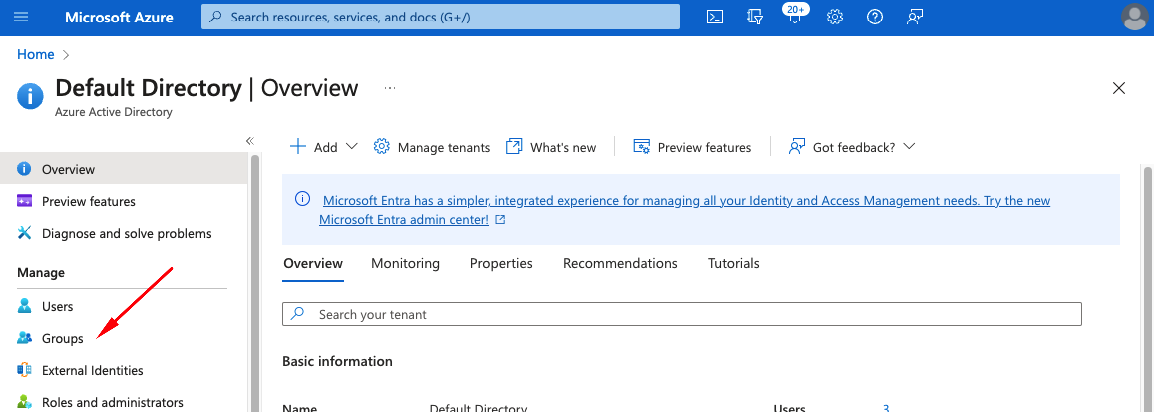
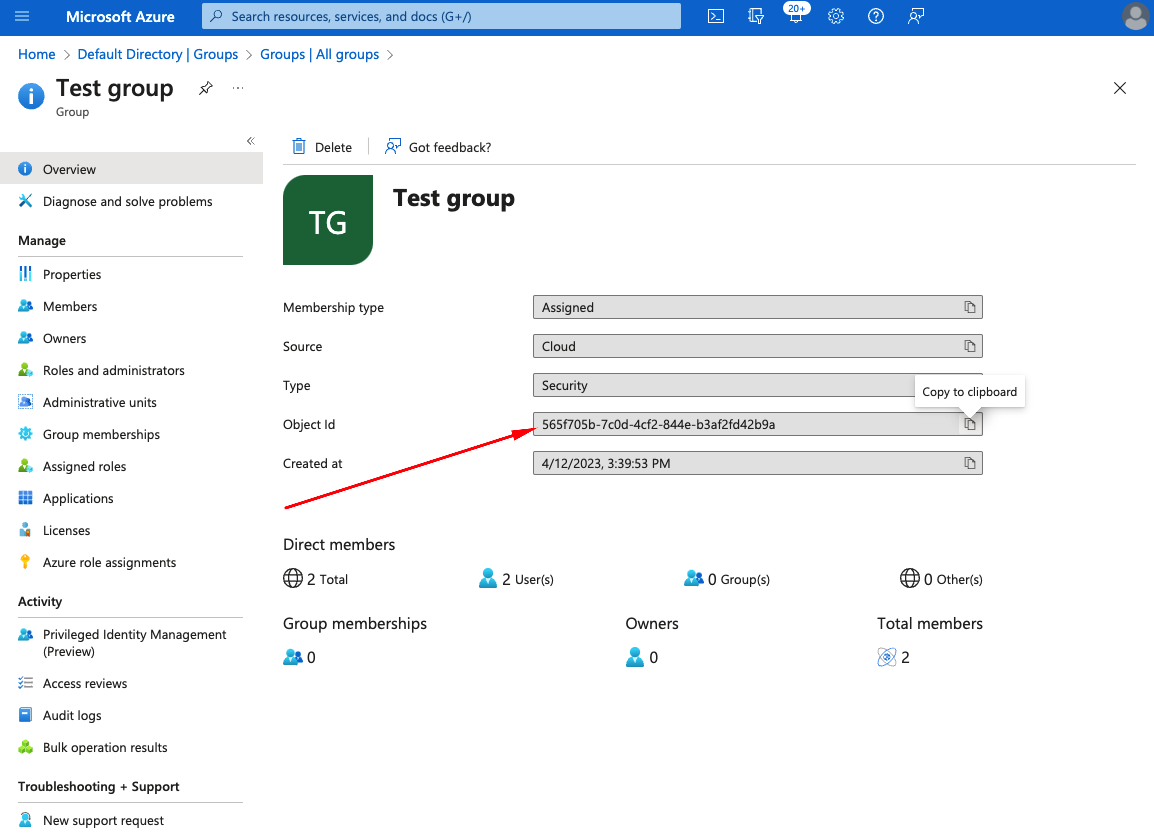
- Add new Group or use existing Group

- Copy Group Object ID
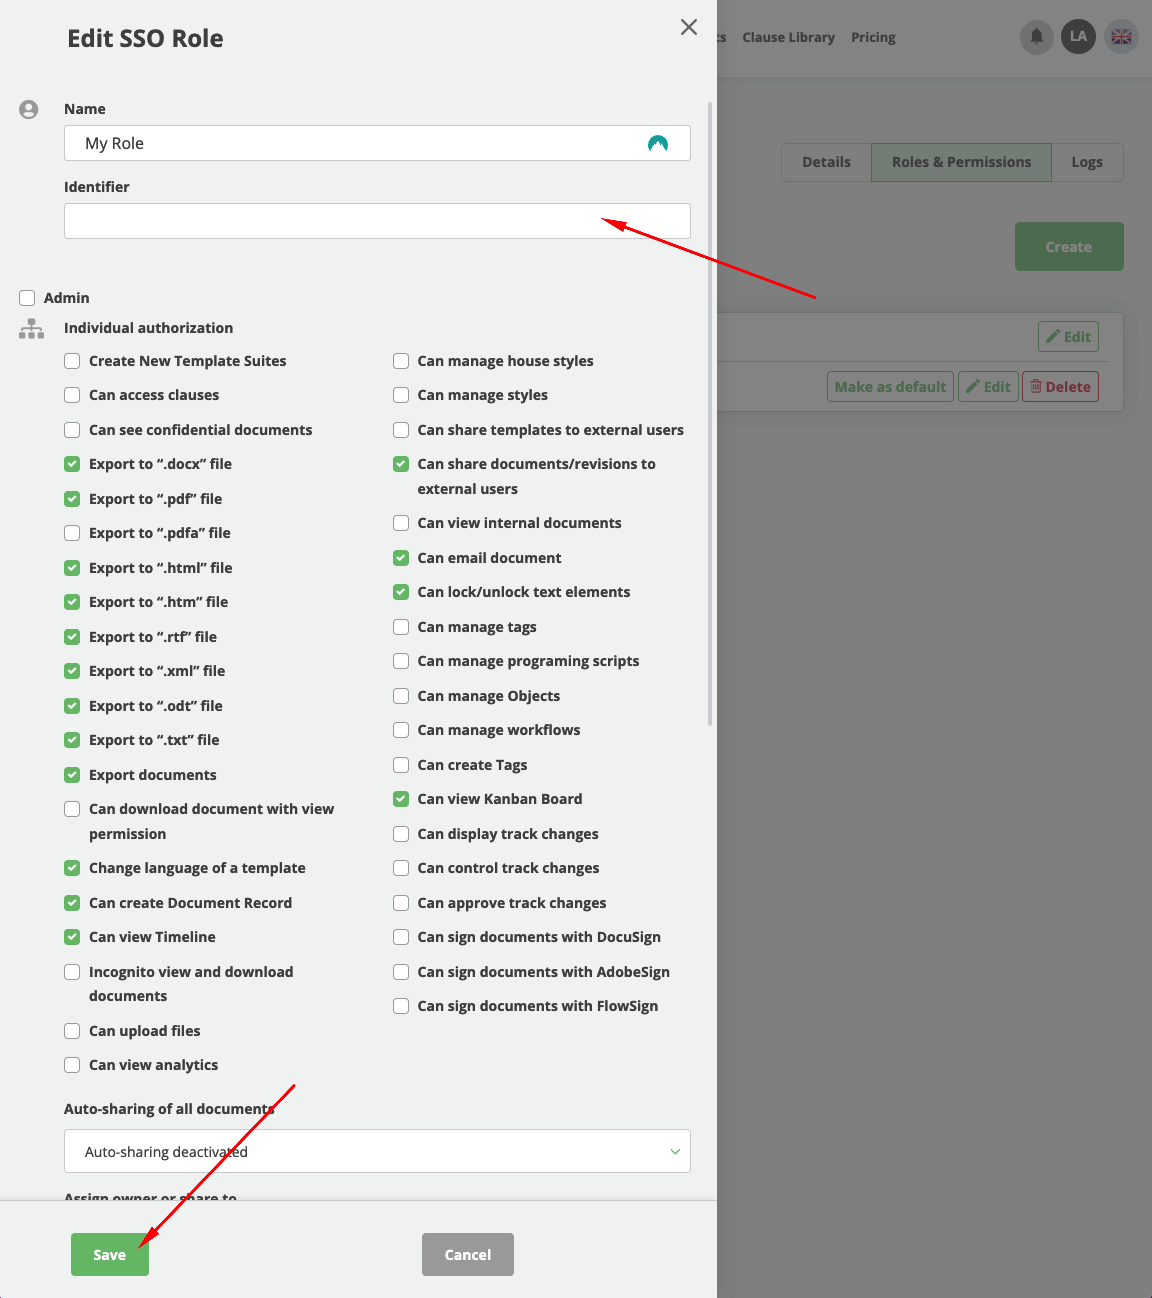
- In Legito select Role that you want to match with Azure AD Group
- Click on Edit button

- Paste Object ID from previous step into Identifier field
- Click on Save button
If a user is included in multiple AD Groups and/or Roles, the first Role from Legito that is matched by its Identifier or Name field will be selected.
Pairing Role with Azure AD Roles
Very similarly to Groups, Roles from AD can also be matched
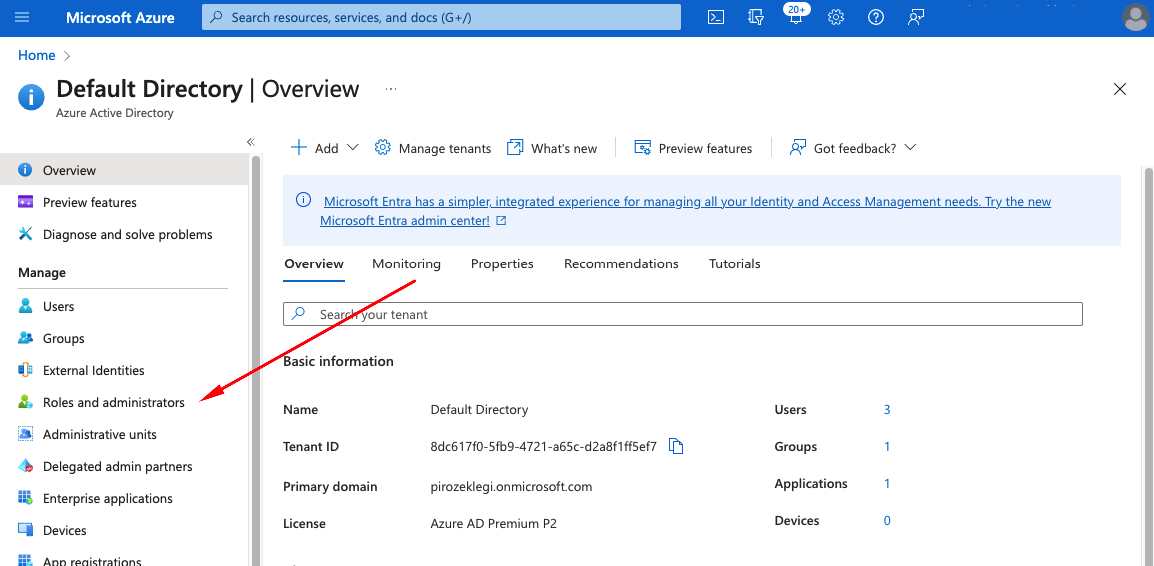
- In Azure AD select Roles and administrators from left menu
- Add new Role or use existing Role
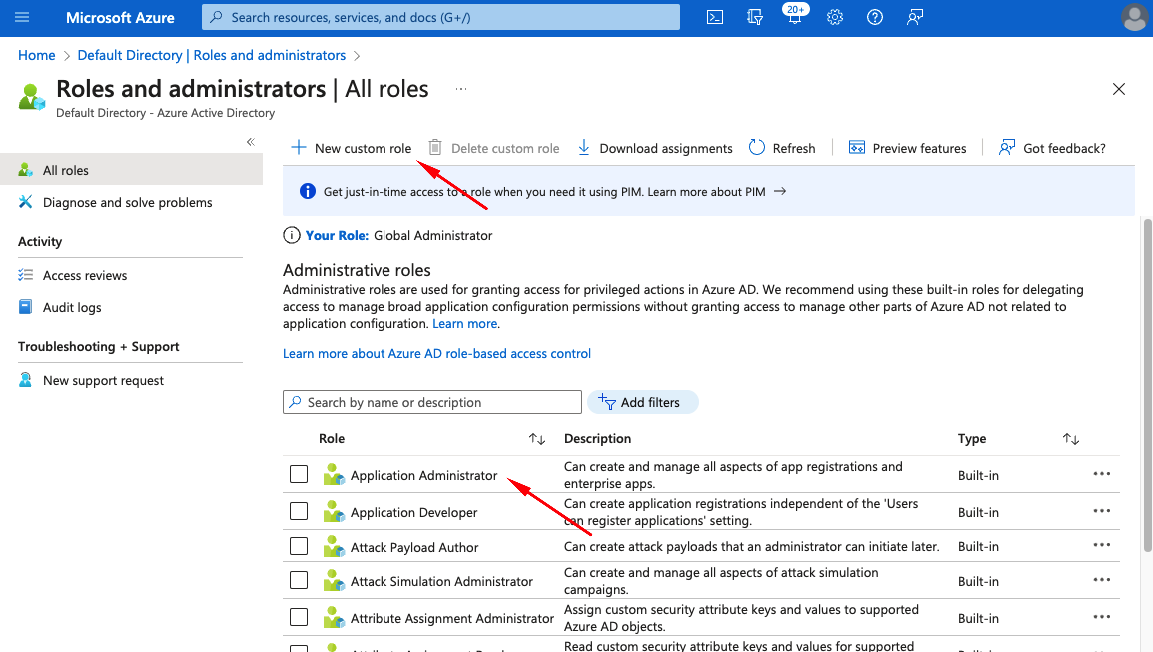
- In Role detail select Description from left menu
- Copy Template ID

- In Legito select Role that you want to match with Azure AD Role
- Click on Edit button
- Paste Template ID from previous step into Identifier field
- Click on Save button
If a user is included in multiple AD Groups and/or Roles, the first Role from Legito that is matched by its Identifier or Name field will be selected.