Search Knowledge Base by Keyword
Clauses
Clauses add a precise structure to Legito templates to ensure that generated documents exactly follow the conditions and other logical dependencies added to the template. Templates are built from Clauses, and made from Elements.
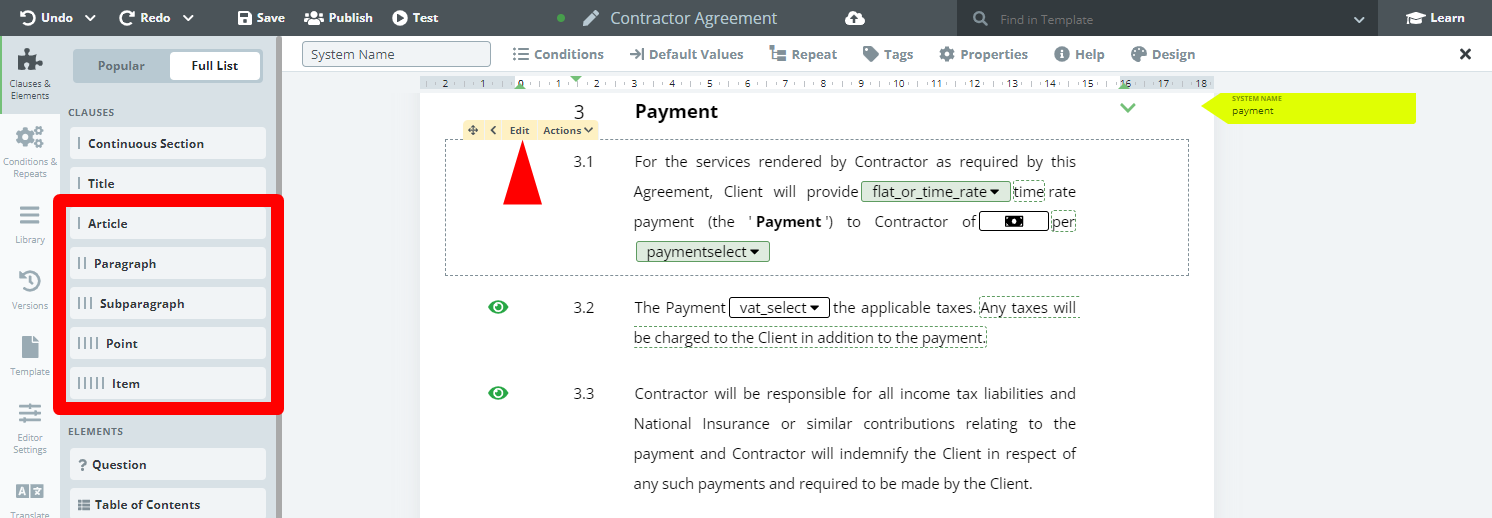
There are five layers to Legito Clause structure. In descending order:
– Articles
—Paragraphs
—Subparagraphs
—-Points
—–Items
When building a template, begin with an Article and then add the remaining levels of the Clause Structure () in declining order as needed. Each Clause aspect must follow the one directly above it in the hierarchy. For instance, it is not possible to add a Subparagraph aspect to an Article unless there is first a Paragraph aspect. It is, however, possible to add a Paragraph aspect by leaving it empty of content.
The most important point to remember about Clauses is that the descending structure controls how the Clauses are affected by applied Conditions or Repeats. Clauses operate using a “parent – child” relationship, meaning that logical dependencies applied to a top level of a clause will trickle down to the lower levels.
For instance, when applying a condition to a Subparagraph, the condition will apply to that Subparagraph as well as its Points and Items. However, the clause containing the modified Subparagraph, in this case, the Paragraph, and its parent clause, the Article, will not be affected by the condition.
The same principle applies to the Elements within a Clause. Conditions applied to a clause will apply to every Element inside that clause.
This feature makes it possible to create complex logical dependencies with ease because instead of adding multiple conditions to the various Elements in a Clause, the “single rule” Condition feature can be employed.
Every Clause aspect placed onto the Editor Canvas automatically creates a Text Element.
All Clauses added to the Template are now added as mandatory Clauses which means the Eye icon for deactivating the clause is removed by default.
Clauses have their own menu items and navigational tools which appear when the cursor hovers over them. Clicking the Edit button, allows you to maintain focus on a clause, “freezing” the Clause for editing. A Clause selected in this manner will be highlighted in orange. Once a Clause’s Edit button is clicked upon, details of the clause can be further modified in the top menu with the following new tabs: Conditions, Repeat, Default Values, Tags, Properties, Help, and Design.
Other Clause modification tools include:
- On the top right, an icon of four arrows will appear (allows users to move a Clause throughout the Editor Canvas using a click and drag functionality, much like the structure widgets on the left menu.
- Between the Move icon and the Edit button, are Hierarchy arrows. After placing a structure widget on to the Editor Canvas, it’s possible to move it up or down a level, depending on your need (e.g. change a subparagraph to paragraph).
- Adding an existing Clause from another section of the template or an entirely different template using the feature;
- Enabling or disabling numbering. Clicking on a number to the left of a clause aspect will remove that number or add one if not already present using the Context Menu (right-click), and the remaining numbers to each of the Clause aspects in the template shall automatically reconcile.
- Clauses are mandatory ( non-removable in the Document Editor) by default. To make a Clause optional ( allowing users to remove it in the Document Editor), use the Arrow icon on the left side of the Clause. An Optional Clause has an Eye icon on the left. An Optional Clause can be made mandatory by clicking the Eye icon.
- Collapsing Article to a single line in order to simplify the view.
- Enabling the Dual Language hide feature, which allows for certain content to be hidden in the second language of Dual Language documents.
- Activating the “Own Clause” feature which permits users to add their own Paragraphs to the Article.
- Adding Help text under the Help tab which lets the template designer add Help text attached to a Clause aspect to guide users generating a Smart Document from the template. In Document Editor, the Help text can be displayed by clicking on a question mark symbol on the right side of a Clause.
Article is a special type of Clause where the article system name is automatically generated by Legito and this name cannot be altered.