Search Knowledge Base by Keyword
eSignature Overview
Use Legito Sign or any other supported eSignature provider (e.g. DocuSign) to sign:
- PDF files generated from Legito Documents (generated from automated Templates)
- PDF files uploaded to Document Records in Smart Document Management
Enable or disable eSignatures in the Basic section of the Workspace Settings. Available for Workspace Admins only.

Once your Workspace is all set (more tips below), you can start your signing process in 3 easy steps:
Step 1: Upload a PDF document or use Legito Template
Drop your PDF document into the Drop Area of your Dashboard, Document Record, or simply click to Start Signing in the Legito Document Editor (if you wish to sign Legito Document).
Only appropriately permissioned users may initiate the signing process.
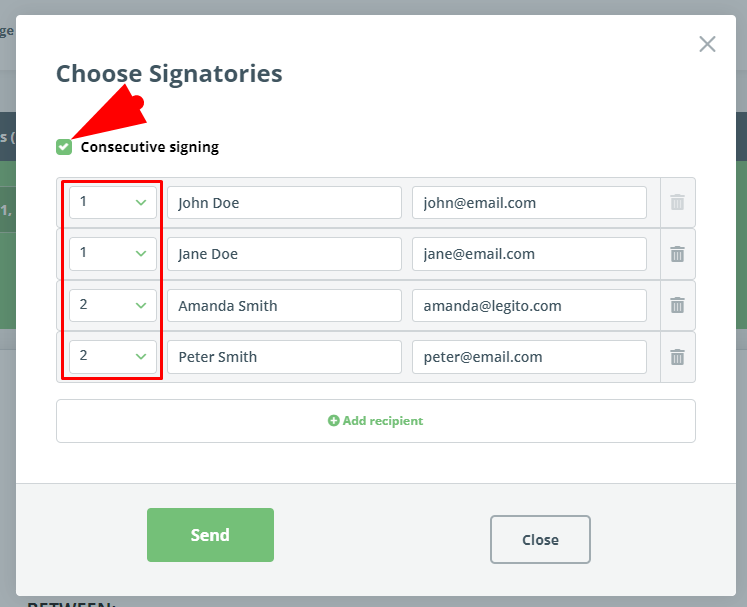
Step 2: Define Signatories
Select your signatories and choose if you want a consecutive order of signatures.
Auto-complete for Signatories
Legito will remember any Signatory a User inserts in your Workspace. When you request this Signatory to sign another document, it will automatically complete their name and email address.
Workspace Admins can manage (add, remove, or modify) the Signatories data in the Signatories section of the Workspace Settings.
Consecutive signing for Legito Sign & DocuSign
It is possible to set the order in which signatories sign the document. To use this feature, activate the “Consecutive signing” checkbox in the Signing modal window.
Step 3: Define fields in a document and launch the signing process
This step applies to Legito Sign only. Learn more in the Legito Sign Editor article.
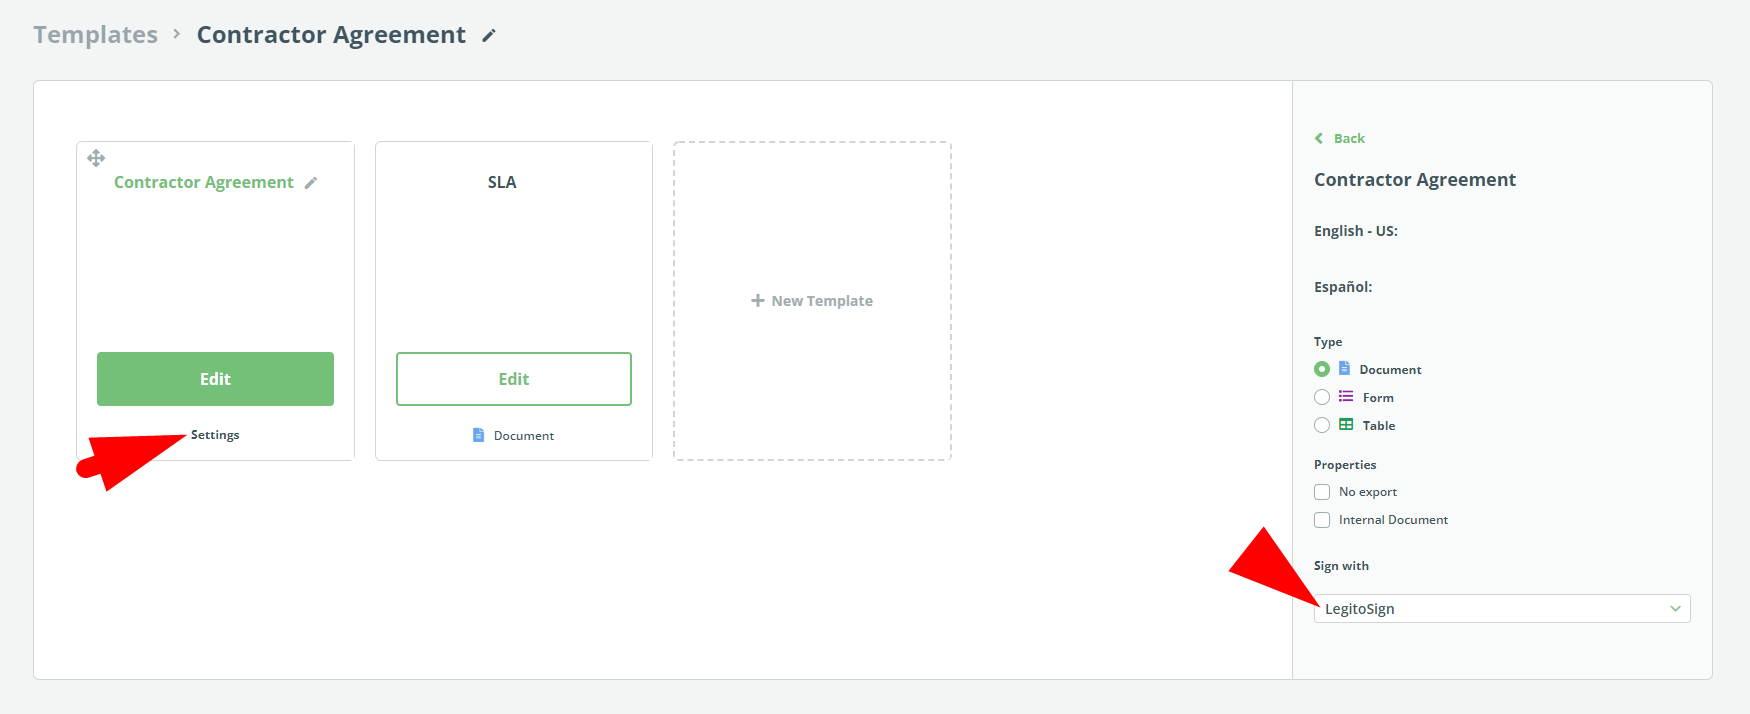
Relation to Legito Templates
Please note that prior to using Legito Sign or any other electronic signature, the Template settings (in Template Administration) must be set to allow the signing of documents created from that Template. Allow Legito Sign or other eSignature for the Template that you would like to use Legito Sign or other eSignature for.
Extraction of signatory information from Legito Documents
It is possible to automatically extract the name and email address of signatories from Legito Documents using Contact Information Template Tags.
Automatic field creation for Legito Sign and DocuSign
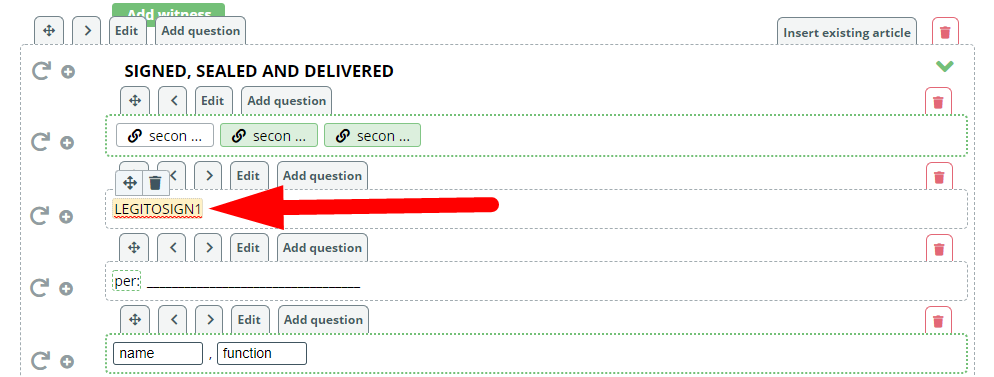
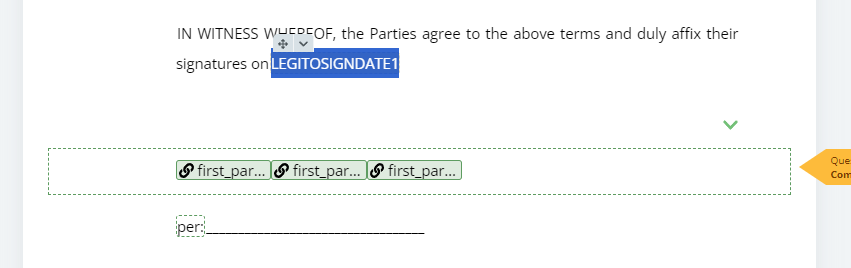
The following annotations for Legito Templates or uploaded PDF documents will automatically create the following field types in Legito Sign and DocuSign:
| Legito Template Annotation | eSignature field type |
| LEGITOSIGN1 | Signature field for the first signatory |
| LEGITOSIGNNAME1 | Name field for the first signatory |
| LEGITOSIGNTITLE1 | Title field for the first signatory |
| LEGITOSIGNCOMPANY1 | Company field for the first signatory |
| LEGITOSIGNEMAIL1 | Email field for the first signatory |
| LEGITOSIGNDATE1 | Date field for the first signatory |
| LEGITOSIGNTEXTFIELD1 | Text (Input) field for the first signatory |
All caps are required for these annotations.
For each subsequent signatory (LEGITOSIGN2, LEGITOSIGN3, etc.), simply increment the number at the end of the annotation. For instance, for the second signatory, it would be LEGITOSIGNDATE2, for the third signatory, it would be LEGITOSIGNDATE3.
Please note that field positioning may not be pixel-perfect. Therefore, we recommend leaving enough space for the fields.
It is recommended to add these annotations in a white font color so they will not be visible in the document. These annotations work both for Legito Documents as well as uploaded documents.
Relation to other components of Legito Workspace
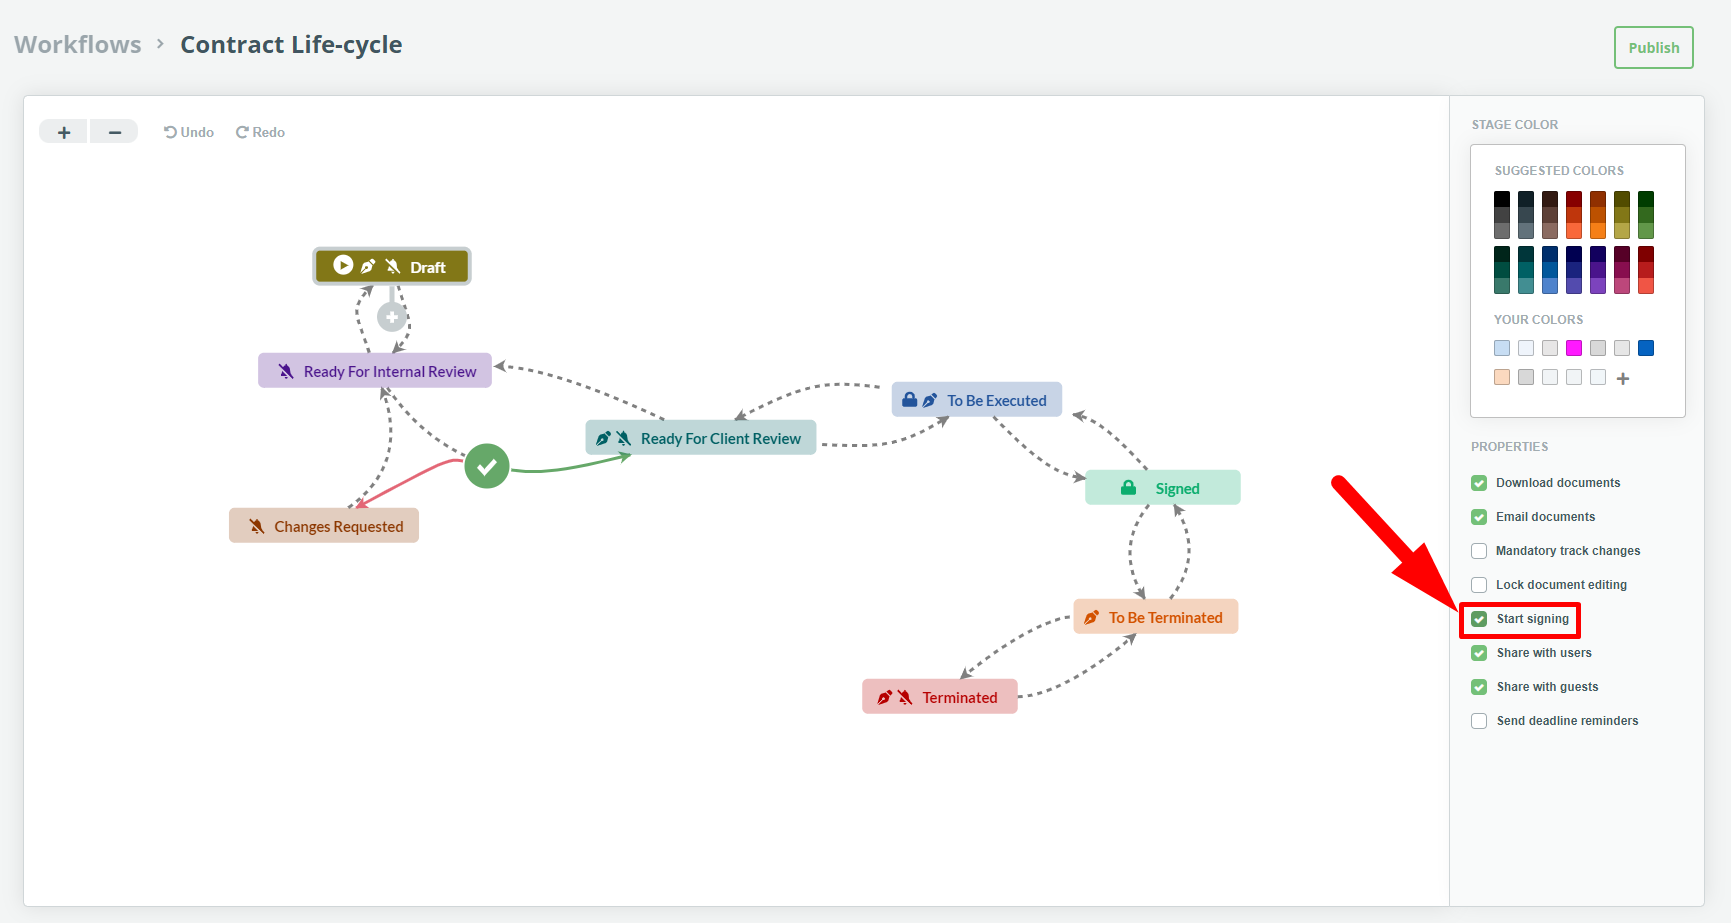
Workflow and Document Records – The signing process and its stages are a sub-process of Legito Workflow Stages and Approvals. Workflow Stages are independent of the signing process stages but can be automatically triggered by them (Triggers: Signing in Process, Document was signed, Signature declined). Each PDF document uploaded to your Workspace automatically generates a Document Record. Once a document has been signed by all signatories, the signed document (PDF) is uploaded to the relevant Document Record (if supported). Ensure that your Workflow settings allow you to start the signing process in the appropriate Workflow Step.
Audit Trail (Timeline) – Events such as the start of a signing process, or that the document has been signed (if supported by the eSignature provider), or the signing process was canceled (if supported by the eSignature provider), are recorded in the Audit Trail (Timeline) for the relevant Document Records related to the eSignature process.
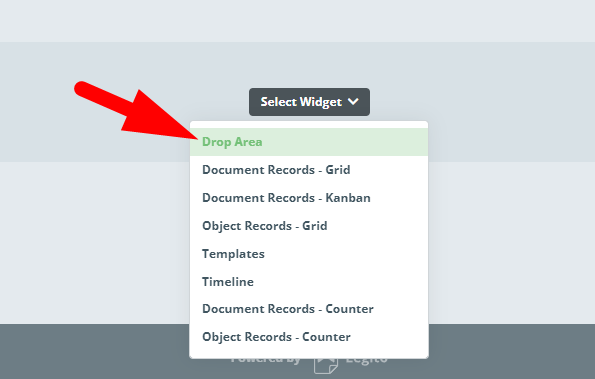
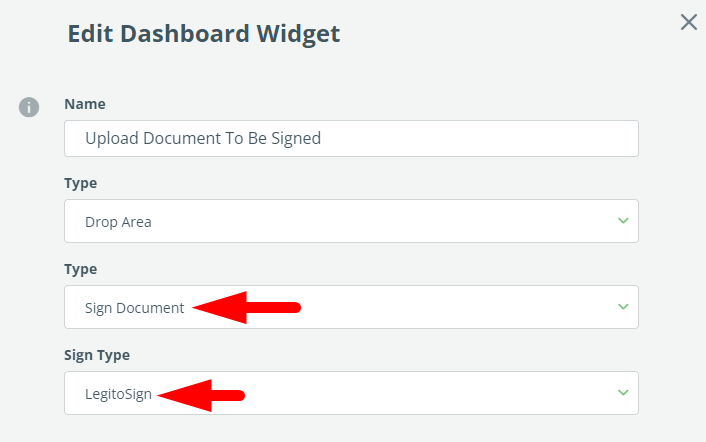
TIP:
If you don’t have a Drop Area on your Legito Dashboard yet, simply create one and select the ”Sign document” type and then select Legito Sign or other eSignature. Learn more about Dashboard customization.